I Got My Hands on Fresh Vanilla Beans and Life Changed 💅
So your girl finally got her hands on some fresh vanilla beans (cue dramatic gasp). And listen — if you know me, you know I’m a vanilla girl. And no, not “boring vanilla” — I’m talking vanilla bean girl. She’s elegant. She’s deep. She’s speckled. She’s anything but basic.
It also helps that my fiancé John is also a vanilla bean guy. He loves anything creamy, subtle, and classic with a twist — which is why this recipe was a win-win.
We’ve been sweating through this SoCal heatwave, so I knew exactly what I needed to do with these beans: make ice cream. But the gag is — we’re doing it with no ice cream maker. Because seriously… who tf just has an ice cream machine sitting around these days?
Why No-Churn Ice Cream is THAT Girl
In case you’re new to the magic: no-churn ice cream is the ultra-creamy, no-fuss version of traditional ice cream that doesn’t require fancy equipment. It relies on whipped cream and sweetened condensed milk to achieve that luscious, scoopable texture — and when you infuse it with real vanilla bean? Oof. Game over.
Why You’ll Love This Vanilla Bean Ice Cream
✔️ No ice cream maker needed
✔️ Just 5 ingredients
✔️ Creamy AF, never icy
✔️ Real vanilla flavor — deep, floral, and fragrant
✔️ Make it in under 20 minutes (plus freeze time)
✔️ Looks fancy, tastes like a gourmet dessert
It’s giving classic, it’s giving elevated, and it’s giving serve-it-in-a-glass-cup-with-a-cookie-on-the-side energy.
What Is Vanilla Bean, Really?
Let’s geek out for a sec. Vanilla beans are the seed pods of a tropical orchid. Inside the pod are tiny black seeds that pack insane amounts of flavor and aroma. They’re:
- Warm and floral
- Slightly earthy
- Sweet but not sugary
- The backbone of all great desserts
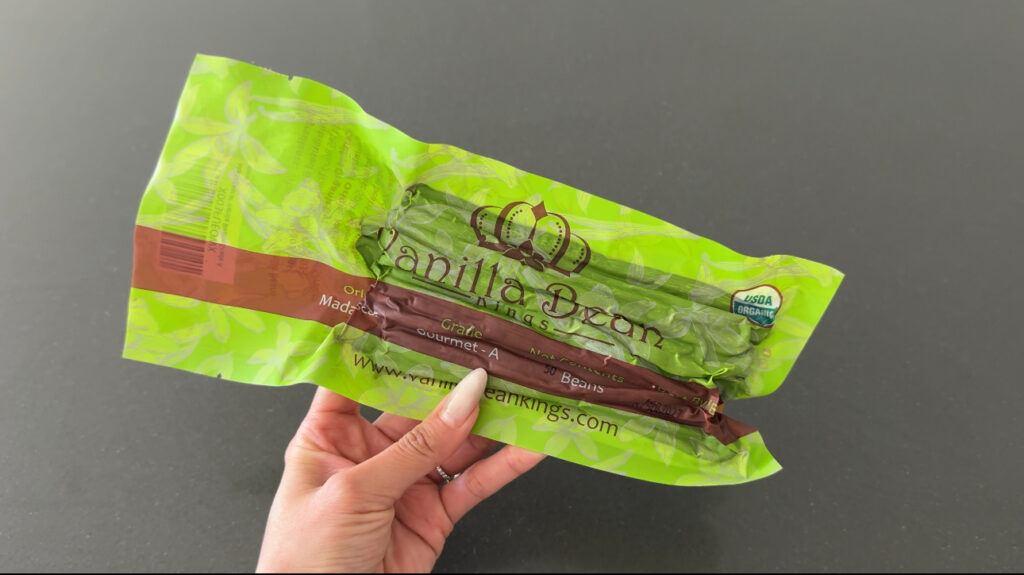
I got my vanilla beans from Vanilla Bean Kings, but you can also buy them online or use vanilla bean paste as a sub.
Yield: About 6–8 servings
Prep Time: 15 minutes
Chill Time: At least 6 hours (preferably overnight)
Total Time: ~6 hours 15 minutes
Skill Level: Beginner-friendly and ice cream maker-free!
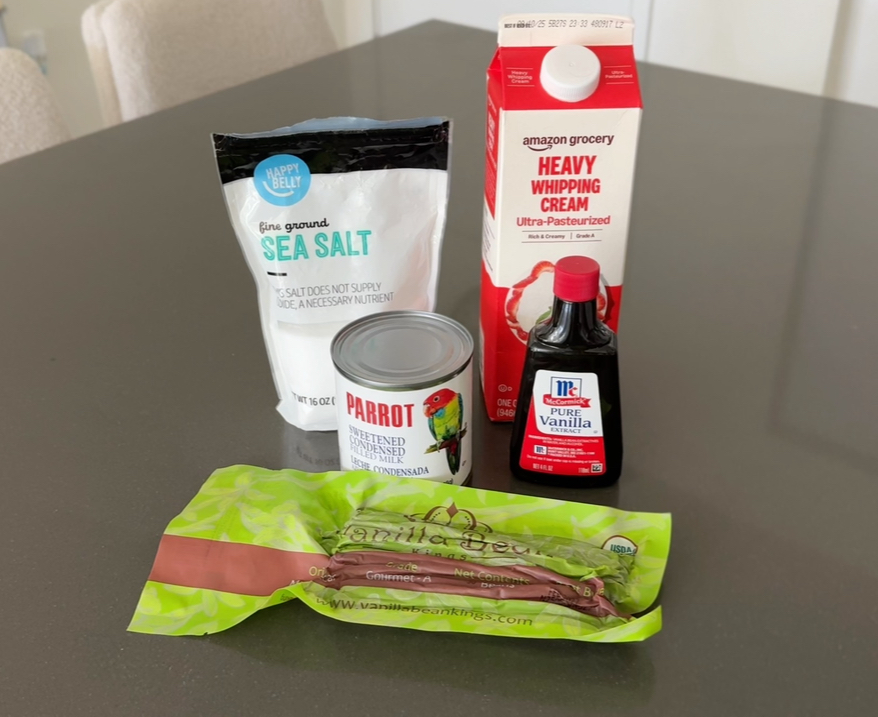
Ingredients You’ll Need ✨
🥛 2 cups (1 pint) heavy whipping cream (cold)
This is your base — it whips into soft peaks and gives your ice cream structure.
🥫 1 (14 oz) can sweetened condensed milk
Adds sweetness and a thick, creamy texture. No extra sugar needed.
🌿 1 whole vanilla bean (or 1 tbsp vanilla bean paste)
Scraped and steeped into the condensed milk — the flavor is everything.
🍦 1 tsp pure vanilla extract
Adds extra depth and a second layer of vanilla flavor.
🧂 Pinch of salt (optional but clutch)
Balances the sweetness and rounds out the flavor.
Tools You’ll Need 🛠️
- Mixing bowls
- Hand mixer or stand mixer (or serious whisking skills)
- Loaf pan or freezer-safe container
- Parchment or plastic wrap
Let’s Make Ice Cream — Without a Machine 💁♀️
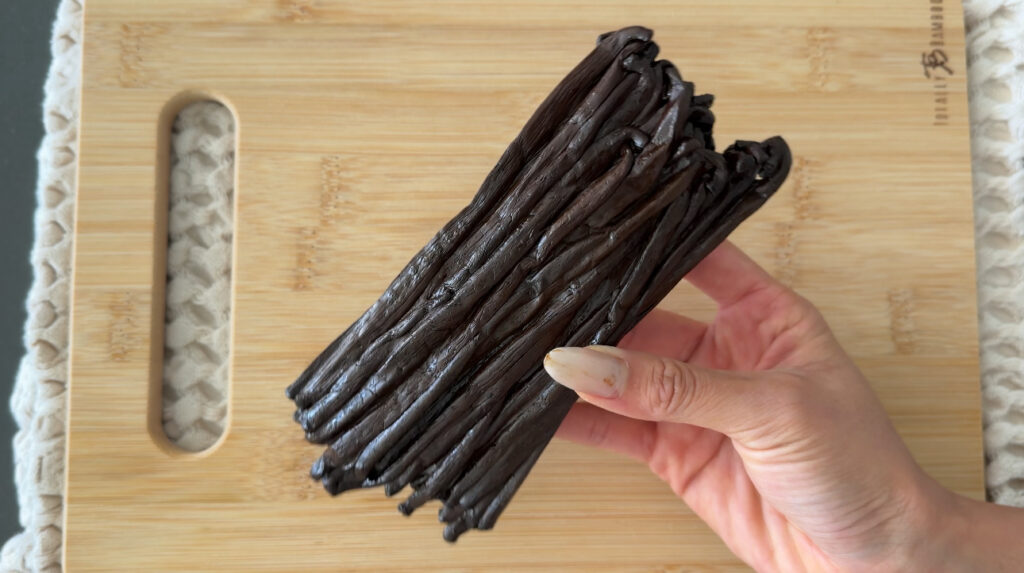
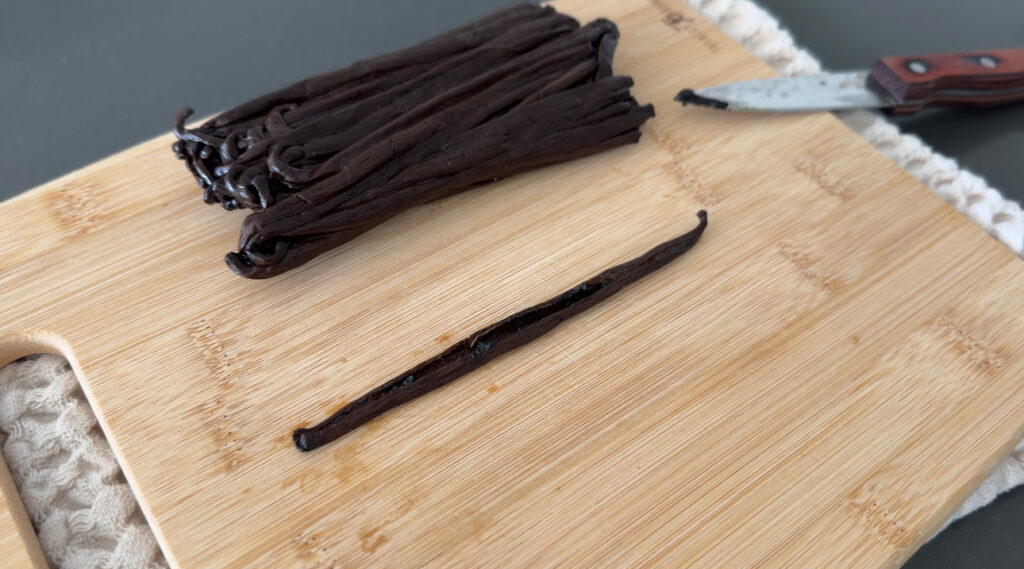
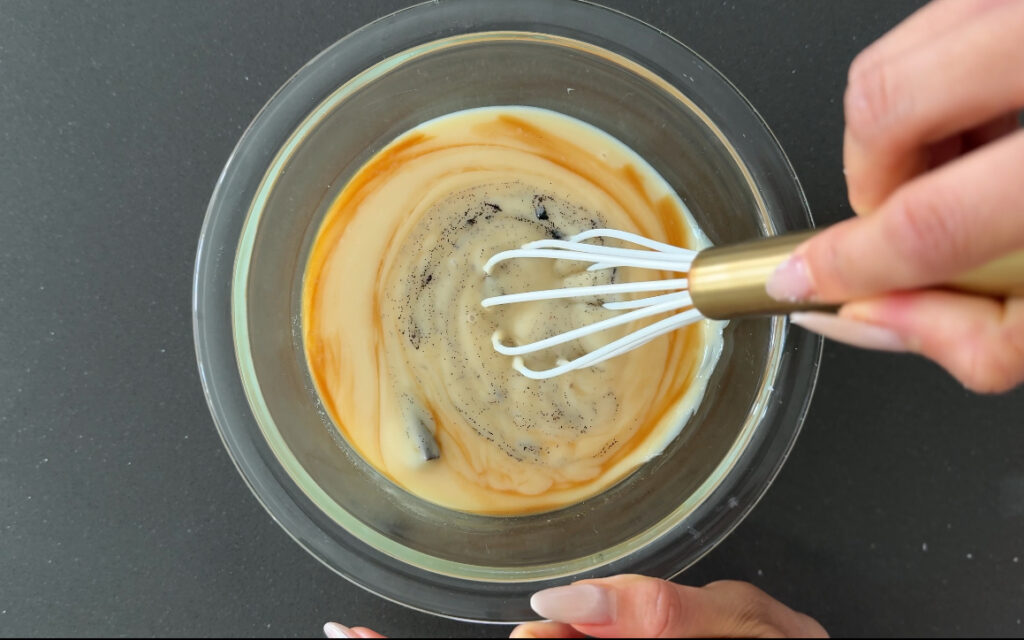
✅ Step 1: Prep the Vanilla Bean
Use a sharp knife to slice the vanilla bean in half lengthwise.
Using the back of your knife, scrape out the seeds (you’ll see tiny black specks).
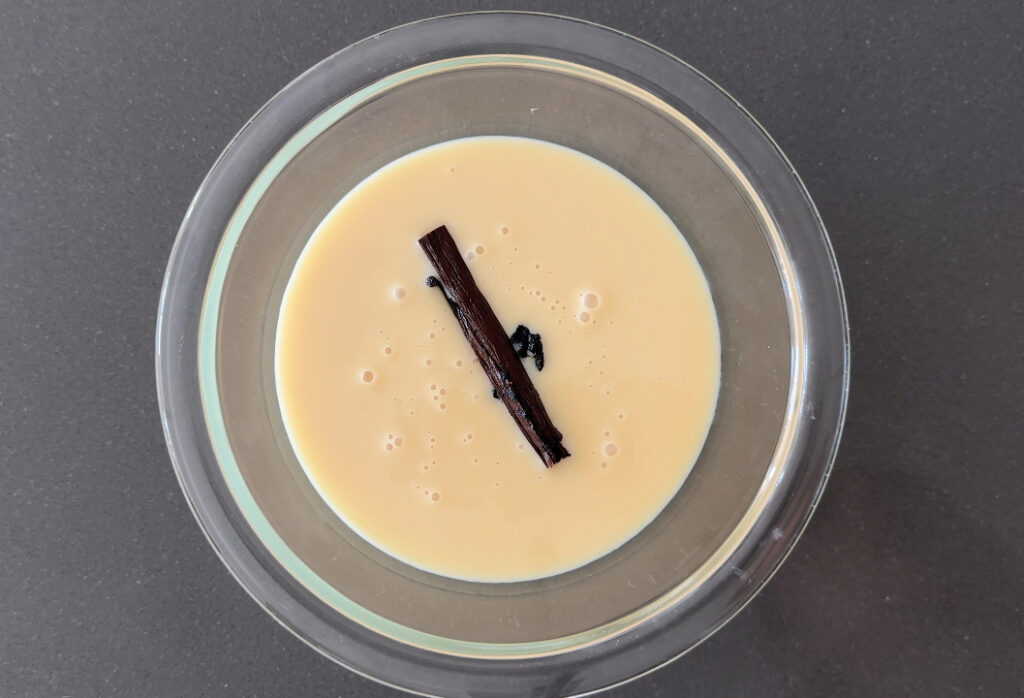
In a bowl, combine:
- Sweetened condensed milk
- Vanilla bean seeds
- The whole scraped pod (yes, toss it in!)
- Vanilla extract
- Pinch of salt (optional)
Let this sit and infuse while you whip your cream. You’ll remove the pod later — we’re just using it to steep flavor.
✅ Step 2: Whip It Good
In a separate bowl, pour in your cold heavy cream.
Using a hand or stand mixer, beat until stiff peaks form — like soft-serve consistency. You want it fluffy, not chunky (don’t overbeat into butter).

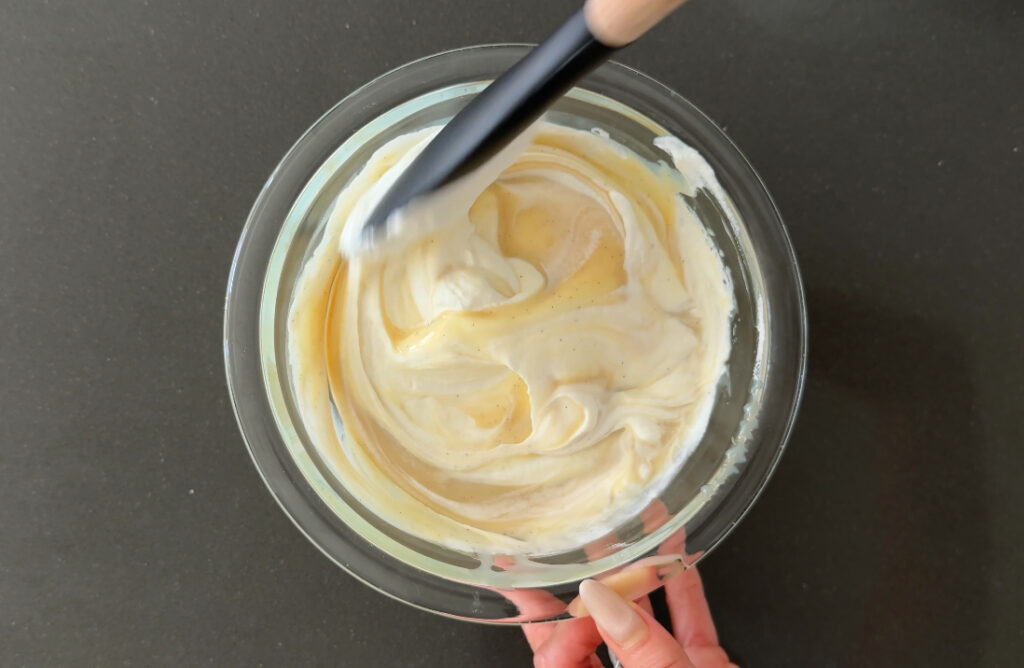
✅ Step 3: Combine Gently
Remove the vanilla pod from the condensed milk mixture and discard.
Add a dollop of whipped cream to the condensed milk to lighten it, then gently fold in the rest in batches using a spatula. Keep it airy — no aggressive stirring!
The final mixture should be fluffy, creamy, and flecked with those iconic vanilla bean specks.
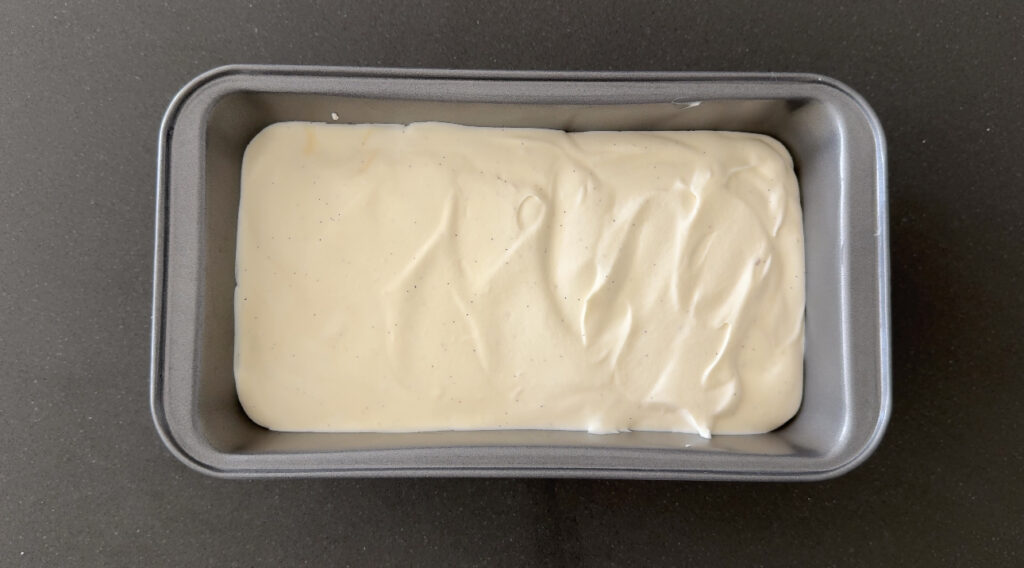
✅ Step 4: Freeze
Transfer your vanilla bean base into a loaf pan or freezer-safe container.
Smooth the top and press a piece of parchment or plastic wrap directly on the surface (this prevents ice crystals).
Pop it into the freezer and let it set for at least 6 hours, or ideally overnight.
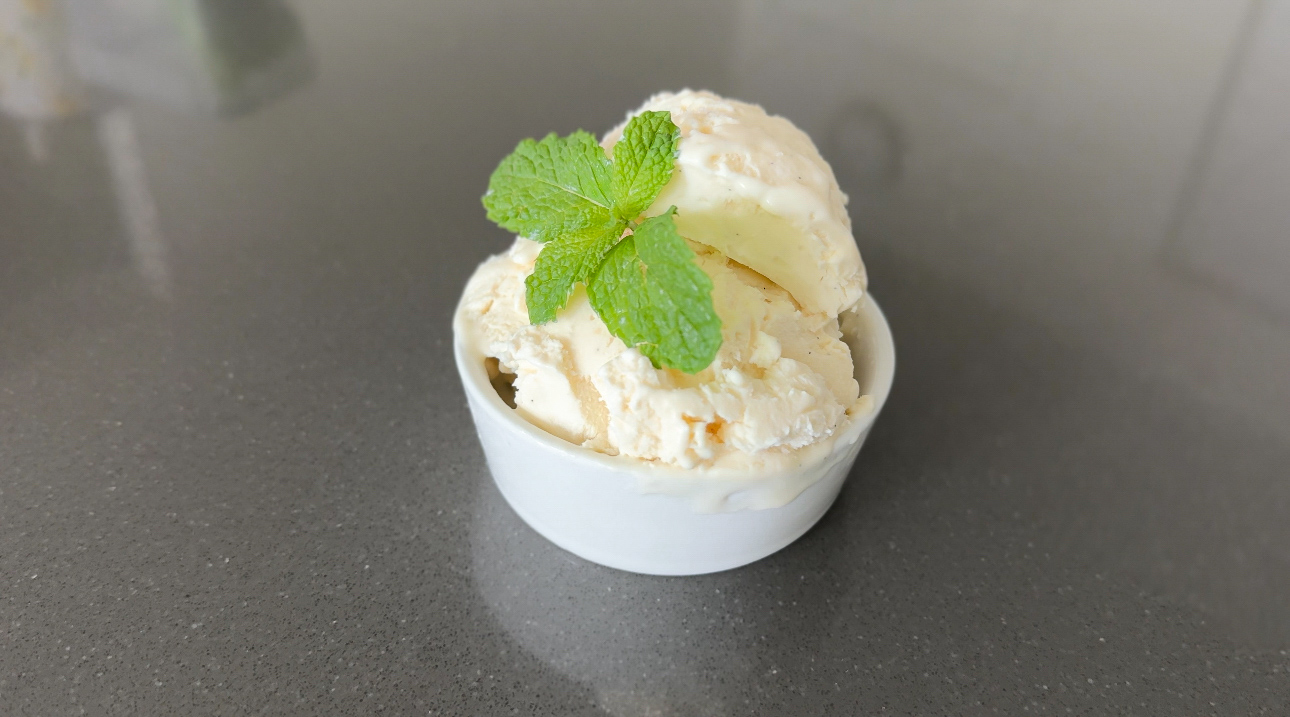
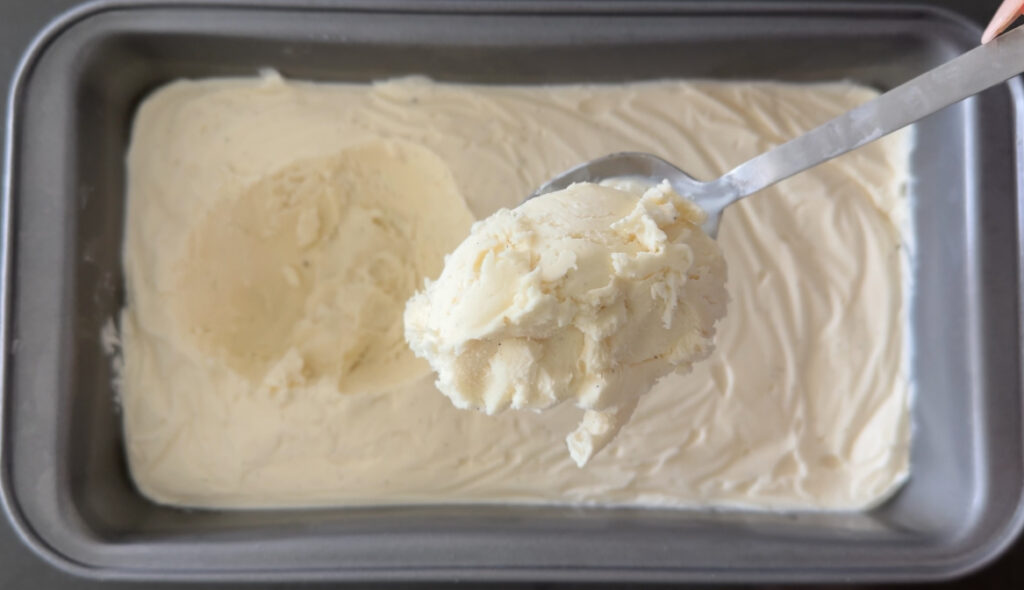
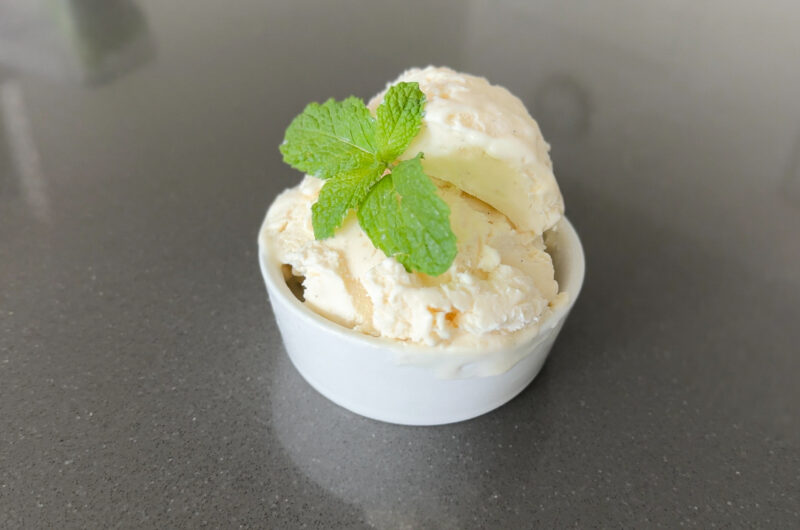
✅ Step 5: Scoop & Enjoy!
Let the ice cream sit at room temp for 5–10 minutes before scooping. It’ll soften just enough for the perfect creamy texture.
Scoop into bowls, cones, or fancy glasses. Sprinkle with sea salt, drizzle with caramel, or top with fruit — or just eat it straight out of the tub (safe space here).
Flavor Variations (Because Why Not?)
🍪 Vanilla Bean + Cookie Crumble
Fold in crushed Biscoff or Oreos right before freezing.
🍓 Vanilla Bean + Berries
Add a swirl of strawberries or blueberries for a tart contrast.
☕ Vanilla Bean + Espresso Swirl
Mix in espresso powder or swirl in cold brew concentrate for a coffee shop vibe.
🌰 Vanilla Bean + Toasted Nuts
Chopped almonds, pecans, or macadamias add crunch and flavor.
Tips for Perfect No-Churn Ice Cream 🧠
💡 Use cold cream
The colder the cream, the better it whips. Chill your bowl too if it’s hot out!
💡 Don’t overbeat
Stop at stiff peaks — if it starts looking grainy, you’ve gone too far.
💡 Let it sit before scooping
No-churn ice cream can freeze a little harder. A few minutes on the counter works magic.
💡 Taste before freezing
Want more vanilla punch? Add a drop more extract before folding in the cream.
Why Vanilla Bean Deserves Respect
Vanilla is often treated like the “plain” flavor — but anyone who’s tasted real vanilla bean knows that’s a lie.
It’s layered, elegant, and rich without being overpowering. It elevates everything. It’s not just a base — it’s the main character when you do it right.
And this ice cream? It’s vanilla bean in her most iconic form. Creamy. Cool. Dreamy. And totally no-churn.
How to Store It
- Freezer: Covered tightly in plastic wrap or an airtight lid.
- Best Within: 2–3 weeks for peak flavor and texture.
- Scoop Tip: Use a warm spoon or scoop dipped in hot water.
Serving Ideas 🍨
- Scoop it between cookies = instant ice cream sandwich
- Top with caramel, nuts, or fresh berries
- Serve in a waffle cone dipped in chocolate
- Pair with warm banana bread or brownies
- Or go full minimalist and serve it with a tiny spoon in a cold bowl (yes chef)
FAQs
Q: Can I use vanilla extract instead of beans?
A: Yes! Use 1 tbsp vanilla bean paste or 2 tsp high-quality extract. You’ll miss the specks, but the flavor will still be fire.
Q: Can I make this dairy-free?
A: You can try full-fat coconut cream + dairy-free condensed milk, but results will vary. Let me know if you want a tested version!
Q: Can I double the recipe?
A: Absolutely! Just use a larger container or divide between two loaf pans.
Final Thoughts: Vanilla, But Make It Iconic 💅
This recipe is proof that vanilla isn’t basic — it’s classic, elevated, and crave-worthy. And when you use real vanilla beans, you get something rich, speckled, and undeniably indulgent.
Also, the fact that you can make this with no machine? Major win. It’s low-effort, high-impact — just like your best content.
So next time someone says vanilla is boring? Give them a scoop of this and watch them change their mind.
📸 Make It? Tag Me @Jenhdao
Show me your ice cream! I wanna see your creations! 🤍🍨🍦
How to make No Churn Vanilla Bean Ice Cream
Course: DessertCuisine: AmericanDifficulty: Easy6-8
servings15
minutesEasy no-churn fresh vanilla bean ice cream.
Ingredients
2 cups (1 pint) heavy whipping cream, cold
1 (14 oz) can sweetened condensed milk
1 whole vanilla bean (or 1 tbsp vanilla bean paste)
1 tsp pure vanilla extract
Pinch of salt (optional)
Directions
- Prep Vanilla Bean:
Slice bean lengthwise and scrape out seeds. Stir seeds and pod into sweetened condensed milk with vanilla extract and salt. Let infuse while whipping cream. - Whip Cream:
In a separate bowl, beat cold heavy cream until stiff peaks form (like soft serve texture). Don’t overwhip. - Combine:
Remove vanilla pod from condensed milk. Fold whipped cream into vanilla mixture in batches. Use a spatula and be gentle to keep it airy. - Freeze:
Pour into a loaf pan. Smooth top, press parchment or plastic wrap onto surface, and freeze at least 6 hours or overnight.
Serve:
Let sit at room temp for 5–10 minutes before scooping for ultimate creaminess.