Prep time: 10 mins | Cook time: 20 mins | Chill time: 1 hour
Total time: ~1 hour 30 mins | Servings: 6–8
💬 Introduction — The Vietnamese Coffee You Can Eat
If you grew up around Vietnamese cafés, you already know — coffee here is not just a drink, it’s a whole culture. From cà phê sữa đá on hot afternoons to cà phê trứng on chilly mornings, coffee isn’t just about caffeine — it’s a vibeeeeeee.
So imagine taking that same bold, silky, slightly sweet Vietnamese coffee flavor… and turning it into jelly.
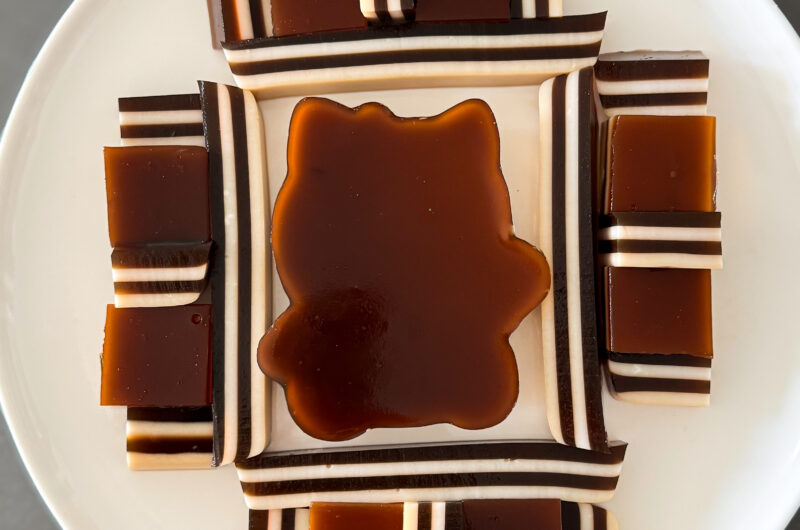
Yes, Sương Sá Cà Phê — aka Vietnamese Coffee Jelly — is the best of both worlds: a jiggly, chewy dessert that doubles as a caffeine fix. You get that deep coffee bitterness balanced with creamy sweetness, and depending on how you serve it, it can be a snack, a dessert, or even a fancy little drink-topping situation.
I first had something like this at a café in Westminster (of course, where else?). It came in a tall cup layered with milk jelly and topped with crushed ice and condensed milk drizzle — like a deconstructed iced coffee you could scoop instead of sip. The texture was insane: soft, silky, and slightly bouncy from the agar agar. And I knew right then… I had to recreate it at home.
So today, I’m showing you how to make Vietnamese Coffee Jelly — with a layer of creamy milk jelly on top (because balance, always). It’s simple, light, and perfect for SoCal heat.
🧠 What Is Sương Sá (Vietnamese Jelly)?
“Sương Sá” (pronounced suong sah) refers to a family of Vietnamese jellies made using agar agar — a natural gelling agent derived from seaweed. Unlike gelatin, agar agar sets firmly and holds up even in warm weather, which makes it perfect for tropical climates (and for us impatient jelly lovers who can’t wait hours for dessert to chill).
You’ll find sương sá in tons of Vietnamese desserts — pandan coconut jelly, coffee jelly, even layered rainbow versions sold at bakeries and dessert shops. It’s the chewy, glassy-looking jelly that makes Vietnamese chè and Asian cafés so fun to eat — that bounce when you spoon into it is what dreams are made of.
☕ The Vietnamese Coffee Layer
Let’s talk coffee — because the coffee layer is the heart of this dessert.
Traditional Vietnamese coffee uses robusta beans, which are darker, stronger, and slightly more bitter than arabica. That’s why cà phê sữa đá (Vietnamese iced coffee) hits so differently. It’s bold, it’s deep, and when paired with condensed milk, it’s perfection.
To recreate that flavor here, you can use instant Vietnamese coffee packets (like G7 or Trung Nguyên) or strong brewed espresso. The agar agar base gives it a subtle chew, while the coffee flavor shines through beautifully.
🥛 The Creamy Milk Layer
Now, the magic is in the contrast. The top layer is creamy, sweet, and soft — a soothing balance to the coffee’s punchiness.
You can make it with whole milk for a classic latte vibe, or coconut milk for a tropical twist that leans into Vietnamese flavors. The optional condensed milk here adds that signature richness that ties everything together (and makes it dangerously addictive).
Together, the layers make a dessert that’s not only aesthetic (hello, café-core content) but also nostalgic — like the Vietnamese version of a layered pudding cup your mom might’ve made if she had agar agar in her pantry.
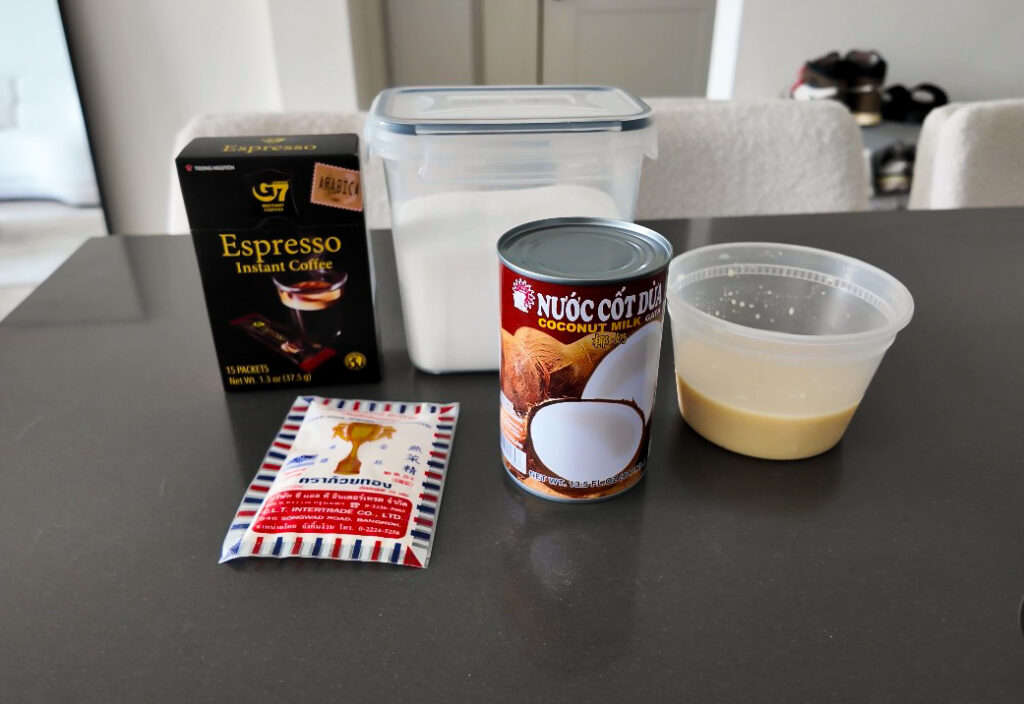
🧾 Ingredients
☕ Coffee Jelly Layer (3 cups)
- 3 cups water (720 ml)
- 1½ tbsp instant Vietnamese coffee (or strong brewed coffee)
- 3 tsp agar agar powder (1 tbsp)
- 4½ tbsp sugar (adjust to taste)
🥛 Milk Jelly Layer (3 cups)
- 1½ cups whole milk or coconut milk (360 ml)
- 1½ cups water (360 ml)
- 3 tsp agar agar powder (1 tbsp)
- 4½ tbsp sugar
- 3 tbsp condensed milk (optional, for extra creamy flavor)
⏱ Time Breakdown
- Prep: 10 minutes
- Cook: 20 minutes
- Chill: 1 hour
- Total: ~1 hour 30 minutes
🍳 Instructions
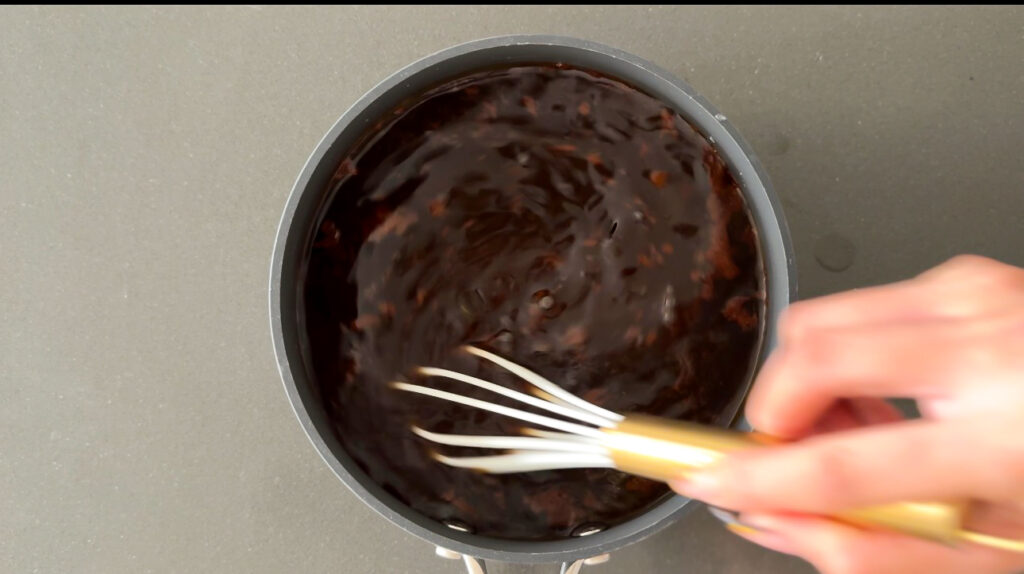
Step 1. Make the Coffee Jelly Layer
In a medium pot, combine:
- 3 cups water
- 1½ tbsp Vietnamese coffee
- 3 tsp agar agar powder
- 4½ tbsp sugar
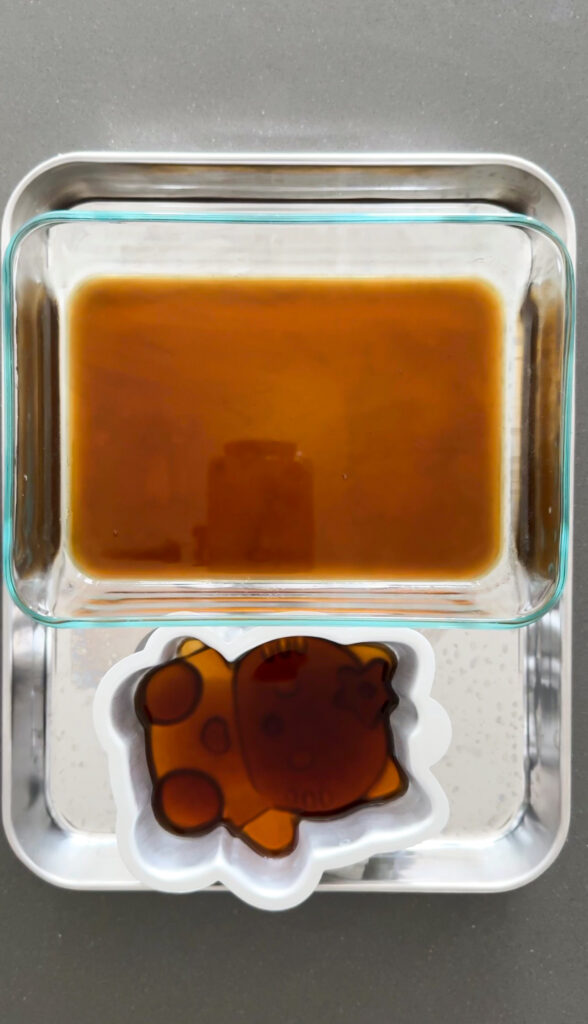
Stir well to dissolve everything, then bring to a gentle boil over medium heat. Continue stirring to prevent clumping or sticking. Once it starts bubbling and the agar fully dissolves, remove from heat.
Pour the coffee jelly mixture into a heatproof tray, pan, or mold — something that’ll let it set into a ½–¾-inch layer. Let it sit at room temp for 5-8 minutes until slightly firm but not fully set.
Pro tip: If you want clean, defined layers, wait until this layer feels firm to the touch before pouring the milk layer on top.
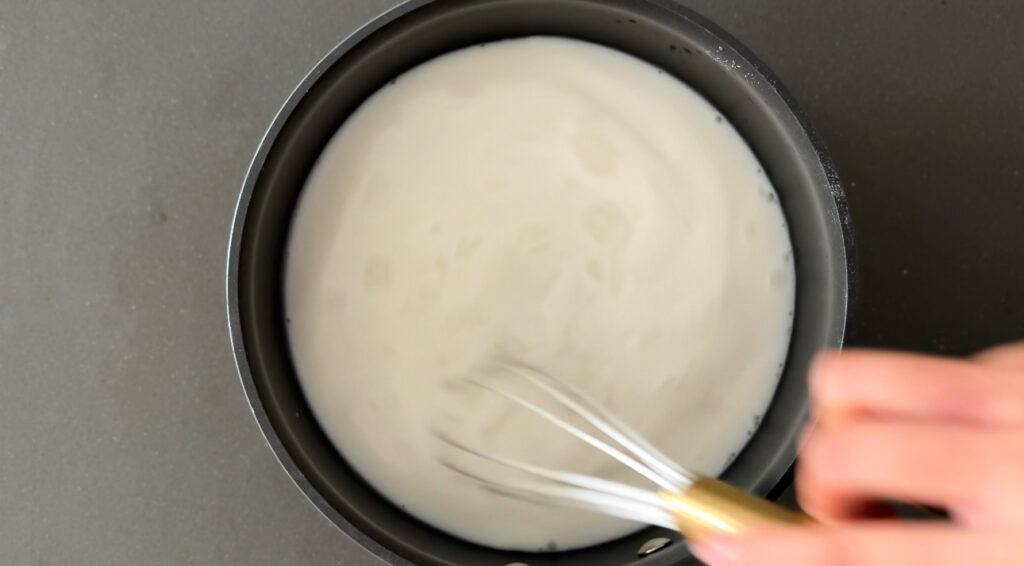
Step 2. Make the Coconut Milk Jelly Layer
In another pot, combine:
- 1½ cups milk (or coconut milk)
- 1½ cups water
- 3 tsp agar agar powder
- 4½ tbsp sugar
- 3 tbsp condensed milk (optional)
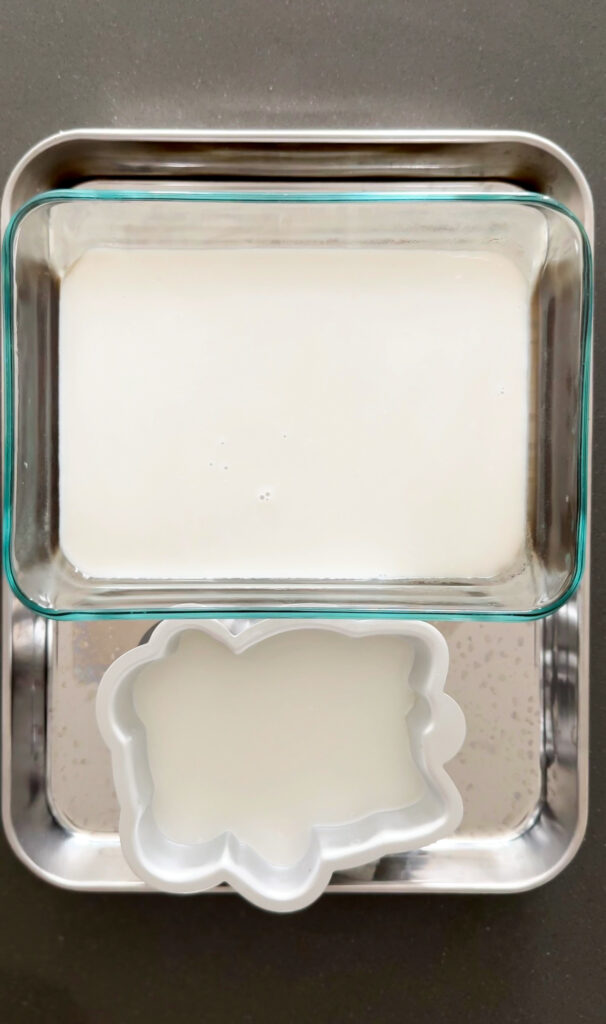
Stir until dissolved. Heat over medium until the mixture comes to a gentle boil, then simmer for 1–2 minutes to activate the agar. Remove from heat and let cool slightly — just enough that it won’t melt the coffee layer underneath.
Slowly pour over the set coffee jelly layer. Repeat the layers until there’s no more.
Step 3. Chill
Let the jelly cool completely at room temp, then refrigerate for at least 1 hour until firm.
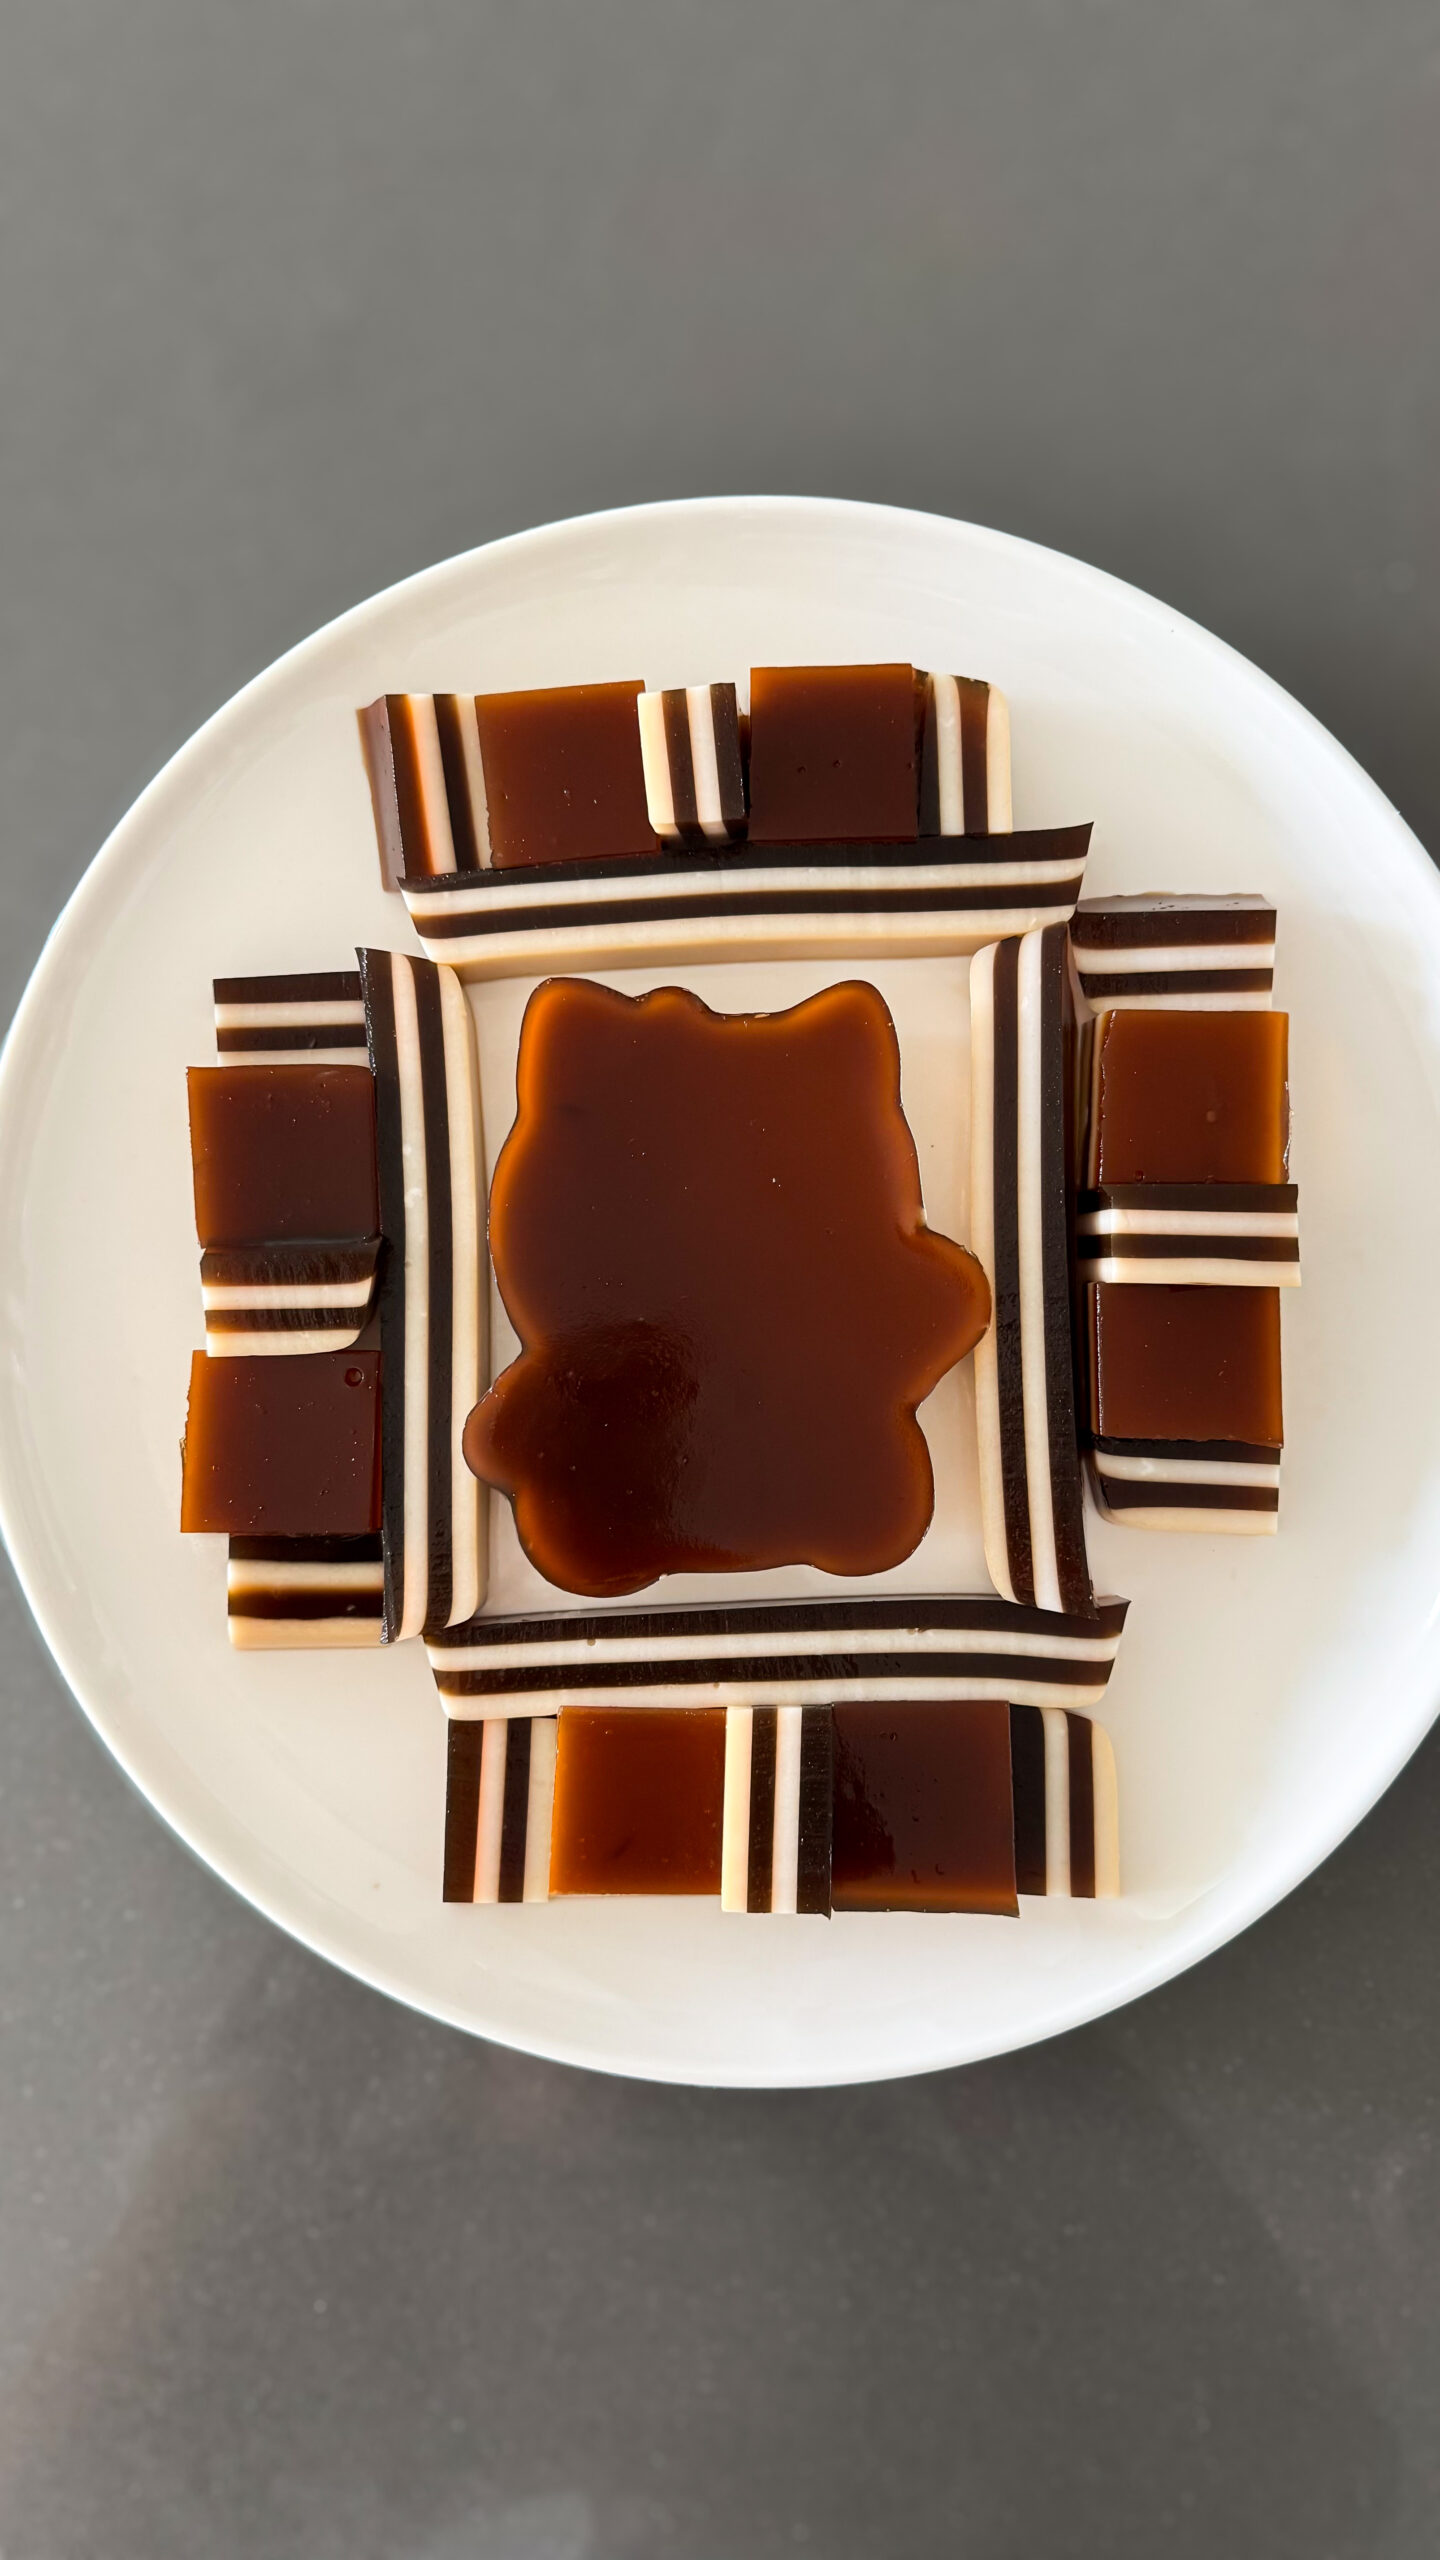
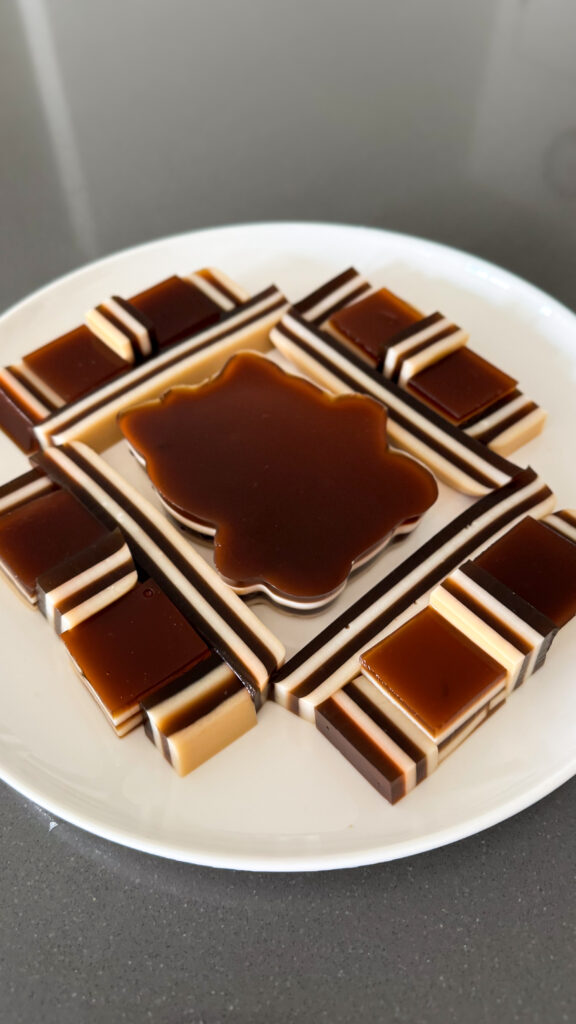
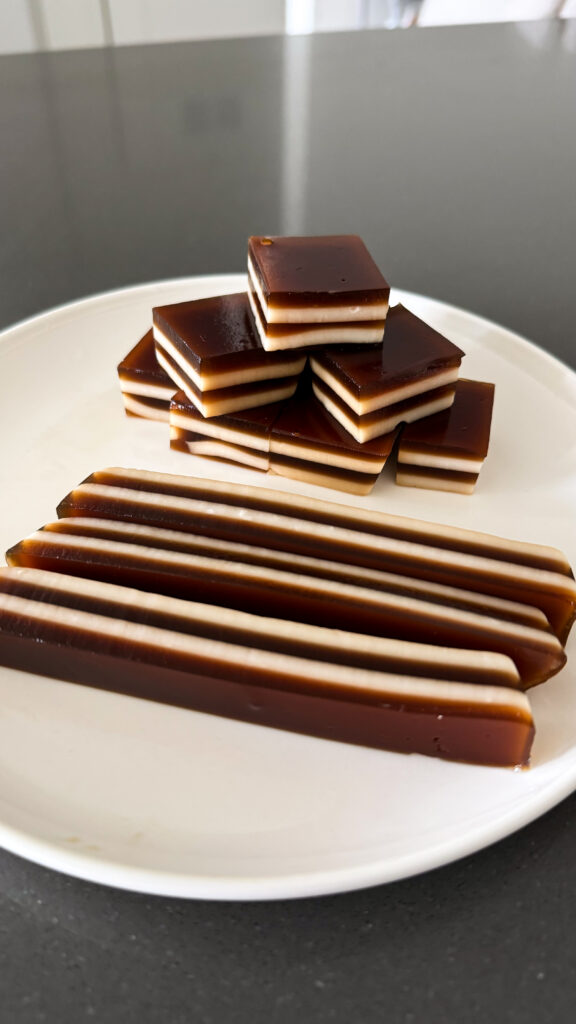
Once set, slice into cubes, bars, or even little diamonds if you’re feeling fancy.
🍨 Serving Ideas
This jelly is so versatile — you can serve it however your heart desires:
- Classic: In a glass bowl with condensed milk drizzled on top.
- Iced: With crushed ice or ice cubes for a refreshing treat.
- Drink-style: Cut into small cubes and toss into a glass of iced milk or Vietnamese coffee for a chewy, café-style drink.
- Chè-style: Combine with coconut milk, jellies, and boba pearls for your own dessert cup creation.
🧠 History of Vietnamese Coffee Jelly
While Sương Sá Cà Phê doesn’t have as long of a history as, say, chè ba màu or chè thái, it’s inspired by Vietnam’s deep-rooted coffee culture.
Coffee was first introduced to Vietnam by French colonists in the 19th century, and since then, it’s become one of the biggest parts of Vietnamese daily life. The country is now the second-largest coffee producer in the world, and that bold robusta flavor is what defines Vietnamese-style brews.
Vietnamese coffee drinks evolved from practicality and creativity — using condensed milk instead of fresh milk (because it stored longer in tropical heat), brewing with the phin filter, and later, transforming those same flavors into desserts like coffee flan, ice cream, and now jelly.
Sương Sá Cà Phê likely drew influence from both Japanese coffee jelly and Vietnamese chè traditions — a fusion of texture and taste. It takes the chewiness and sweetness of traditional Vietnamese jelly desserts and marries it with the bitter, deep aroma of cà phê sữa đá.
So while it feels modern, it’s very much Vietnamese at heart — bold, balanced, and fun to eat.
💡 Tips & Tricks
✅ Texture Check: Agar agar sets much firmer than gelatin, so if you want a softer jelly, reduce the agar slightly (2½ tsp instead of 3).
✅ Layer Cleanly: Let the first layer almost set before pouring the next. Too soon, and they’ll blend; too late, and they might separate.
✅ Coffee Strength: Adjust your instant coffee to taste — for a stronger Vietnamese flavor, go bold.
✅ Coconut Twist: Coconut milk adds natural sweetness and aroma that pairs beautifully with coffee — it’s like a tropical latte in jelly form.
✅ Serving Cold: Always chill before serving. This dessert is meant to be refreshing, not room-temp.
🥥 Why You’ll Love This Recipe
- No fancy tools needed — just a pot and some patience.
- Totally customizable (layer, swirl, or even cube it up).
- Keeps well in the fridge for 3–4 days.
- Gluten-free, egg-free, and dairy-flexible.
- Basically, Vietnamese iced coffee you can chew.
💭 My Thoughts
I’ll be honest — I wasn’t always a jelly person growing up. Chè was more my thing, especially when my mom made chè đậu xanh or chè thai. But once I started experimenting with agar agar, it unlocked a whole new world of Vietnamese dessert nostalgia — one that’s equal parts playful and refreshing.
This Sương Sá Cà Phê hits all those notes for me: the bold coffee flavor I can’t live without, the creamy sweetness I crave, and that soft, chewy texture that’s just fun.
It’s the kind of dessert you can make ahead, bring to a potluck, or snack on mid-afternoon when the heat hits and you don’t want anything heavy.
And best part? You can totally make it your own — swirl in cocoa, layer it with pandan, or top with boba. Vietnamese desserts have always been about creativity, and this one’s no different.
🍮 In Short
Vietnamese Coffee Jelly (Sương Sá Cà Phê) is a modern take on traditional Vietnamese jelly desserts — a blend of coffee culture and texture play. With two layers — a bold coffee base and a creamy milk or coconut top — it’s light, cooling, and deeply satisfying.
Whether you grew up sipping cà phê sữa đá with your parents or just discovered Vietnamese coffee recently, this jelly is the perfect way to experience those flavors in a totally new form.
So go ahead — make it once, and I promise, your fridge will never be without it again.
✨ Final Thoughts
This recipe is the perfect blend of what Vietnamese desserts do best — playful textures, layered flavors, and pure nostalgia in a spoonful.
It’s simple, it’s beautiful, and it tastes like a Vietnamese café condensed into jelly form.
So next time you crave cà phê sữa đá but want something to eat, not sip — this is your sign to make Sương Sá Cà Phê.
How to Make Thạch Cà Phê (Vietnamese Coffee Jelly)
Course: RecipesCuisine: asian, vietnamese, vietDifficulty: easy6-8
servings10
minutes20
minutesIngredients
- Coffee Layer
3 cups water
1½ tbsp instant Vietnamese coffee
3 tsp agar agar powder
4½ tbsp sugar
- Coconut Milk Layer
Milk Jelly Layer
1½ cups coconut milk1½ cups water
3 tsp agar agar powder
4½ tbsp sugar
3 tbsp condensed milk (optional)
Directions
- Make the Coffee Jelly Layer
In a medium pot, combine:
3 cups water
1½ tbsp Vietnamese coffee
3 tsp agar agar powder
4½ tbsp sugar
Stir well to dissolve everything, then bring to a gentle boil over medium heat.
Continue stirring to prevent clumping or sticking. Once it starts bubbling and the agar fully dissolves, remove from heat.
Pour the coffee jelly mixture into a heatproof tray, pan, or mold — something that’ll let it set into a ½–¾-inch layer. Let it sit at room temp for 5-8 minutes until slightly firm but not fully set.
Pro tip: If you want clean, defined layers, wait until this layer feels firm to the touch before pouring the milk layer on top. - Make the Coconut Milk Jelly Layer
In another pot, combine:
1½ cups milk (or coconut milk)
1½ cups water
3 tsp agar agar powder
4½ tbsp sugar
3 tbsp condensed milk (optional)
Stir until dissolved. Heat over medium until the mixture comes to a gentle boil, then simmer for 1–2 minutes to activate the agar. Remove from heat and let cool slightly — just enough that it won’t melt the coffee layer underneath.
Slowly pour over the set coffee jelly layer. Repeat the layering effect with coffee and coconut milk until there’s no more. - Chill
Let the jelly cool completely at room temp, then refrigerate for at least 1 hour until firm. Once set, slice into cubes or bars.


I tried this tonight and my first coffee layer never set. What did I do wrong?
Hi Lily! How long did you wait for? Maybe try a tsp bit more of agar, agar powder and wait a bit longer before the next layer!