
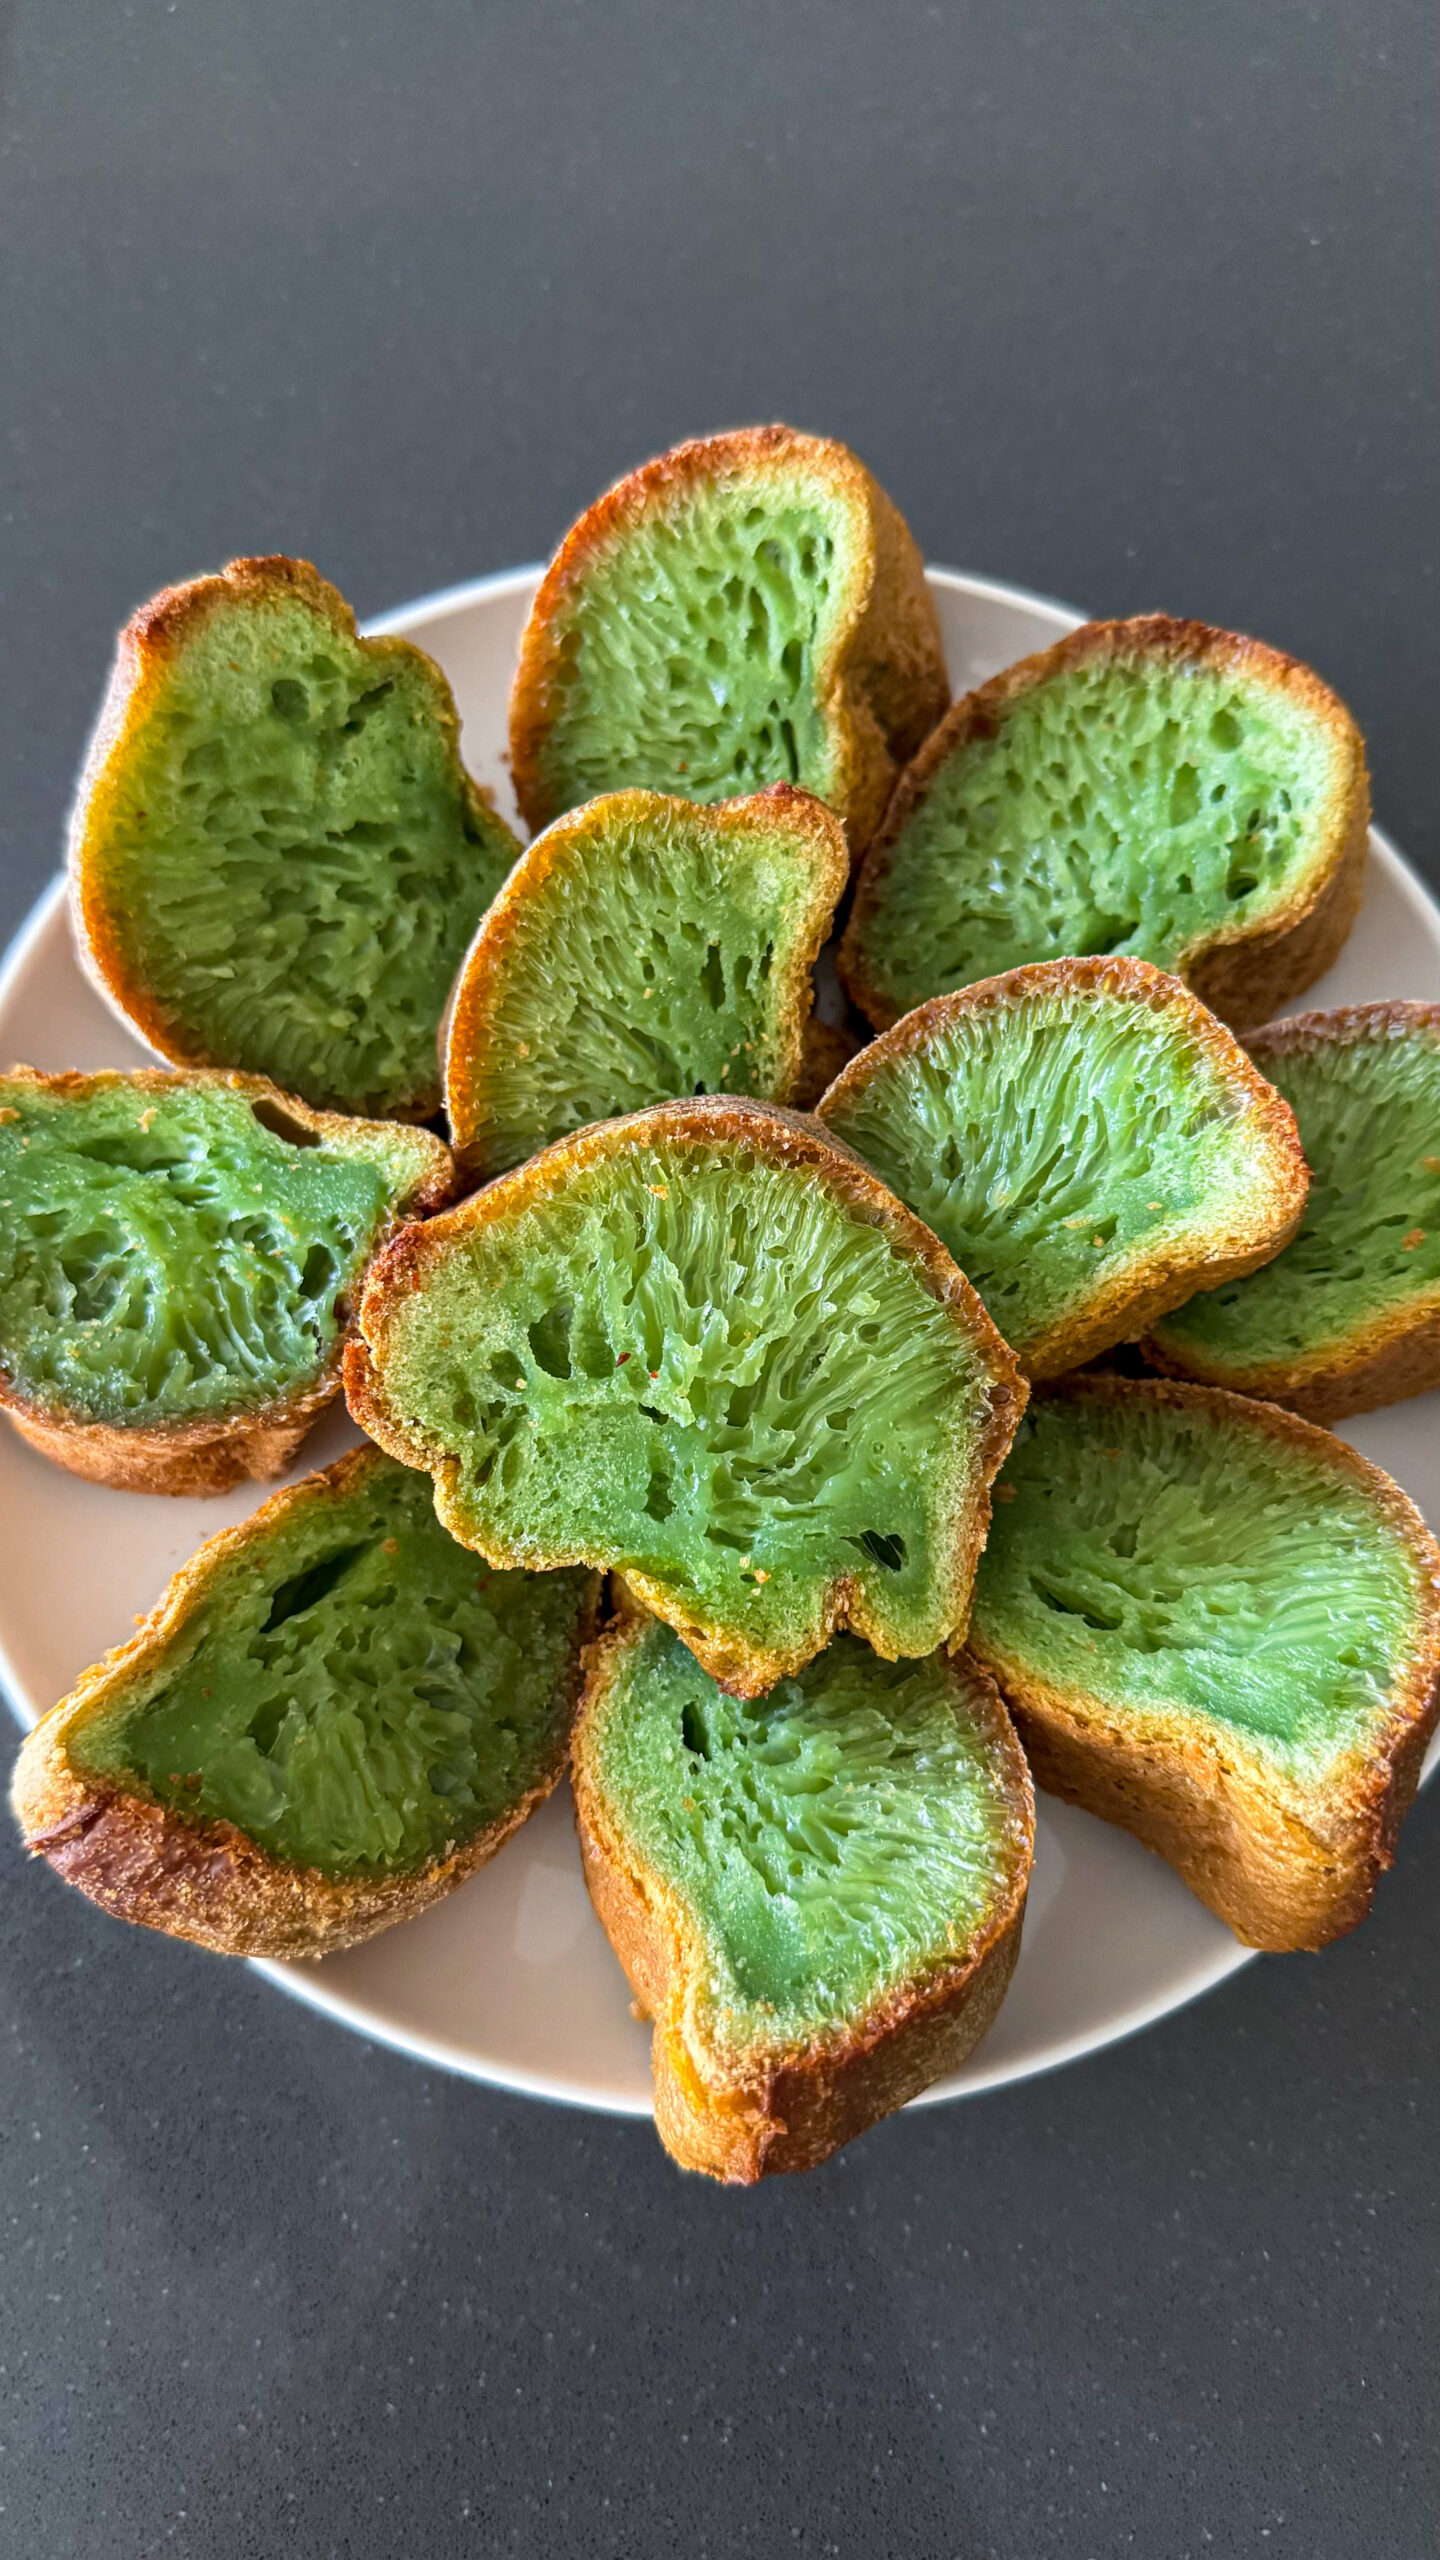
If there’s one Vietnamese dessert that has humbled me more times than I care to admit, it’s bánh bò nướng, also known as Vietnamese pandan honeycomb cake.
And when I say humbled, I mean watching a beautiful cake rise in the oven like a hot air balloon, only for it to completely collapse the second I open the oven door. If you’ve made this cake before, you probably know exactly what I’m talking about.
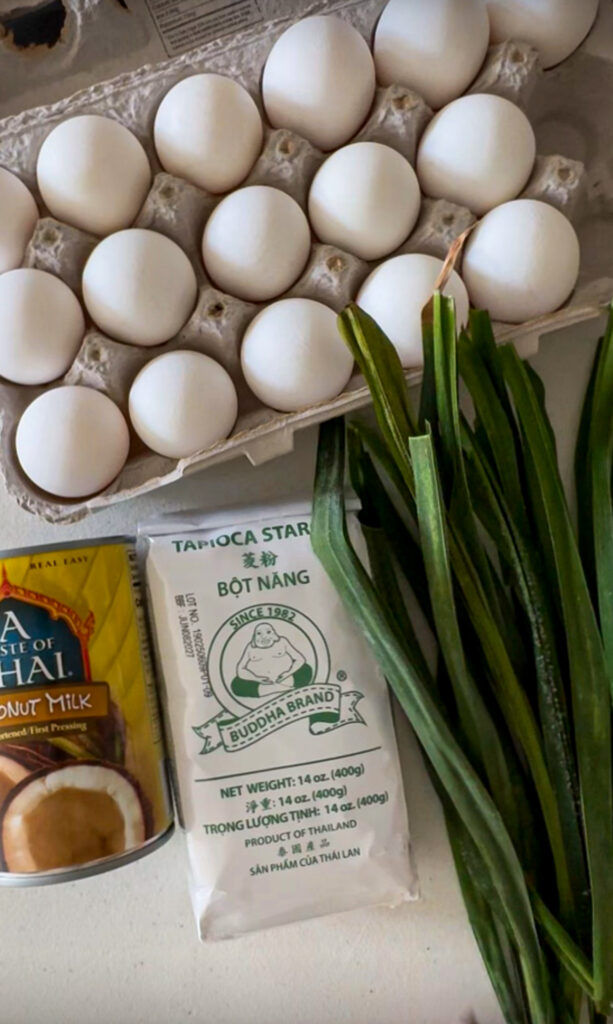
The frustrating part is that bánh bò nướng doesn’t require a complicated ingredient list. We’re talking about eggs, tapioca starch, coconut milk, sugar, pandan, and baking powder. That’s basically it.
But the technique? That’s a whole different story.
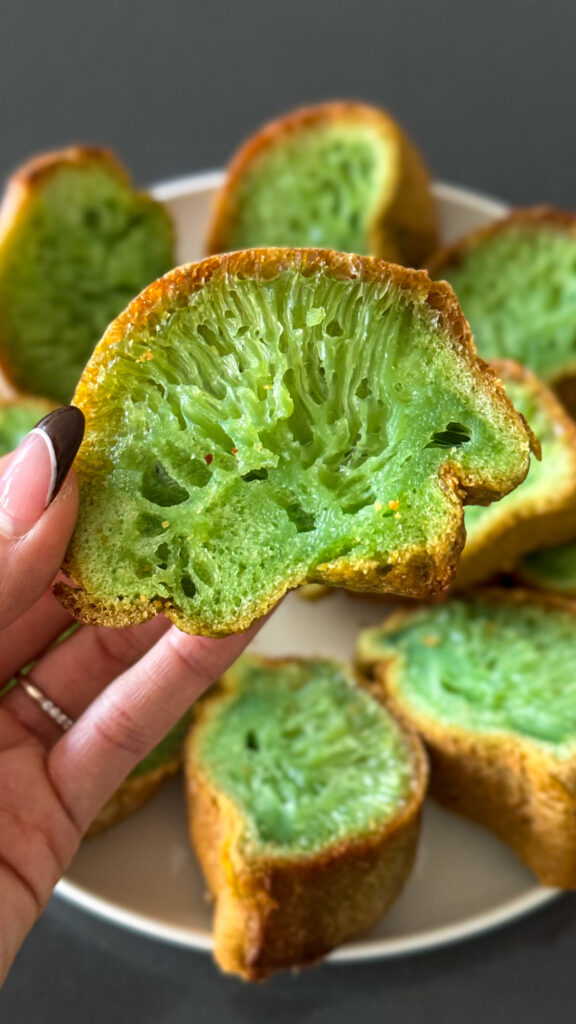
I originally shared this recipe years ago after making it with my dad. He had spent several summers experimenting with different measurements, baking times, and techniques to get that beautiful honeycomb texture inside.
And if you know anything about Vietnamese parents and their recipes, you know measurements aren’t always their strongest form of communication. Sometimes it’s a little of this, a little of that, and somehow everything works out perfectly.
Meanwhile, I’m standing there trying to translate everything into actual measurements so the rest of us can recreate it.
Over the years, I’ve received messages from readers telling me their cakes rose beautifully but completely deflated afterward. Some ended up with a dense, gummy cake instead of those signature honeycomb strands.
I’ve experienced the exact same thing.
So I decided it was time to revisit this recipe, talk to my dad about what he’s been doing differently, and simplify the entire process.
The original recipe used eight eggs, and my dad has experimented with versions using nine. But considering it’s usually just John and me at home, I wanted something smaller that didn’t require almost an entire carton of eggs.
After more experimenting, I was able to make a six-egg version that developed those beautiful, long honeycomb strands using regular double-acting baking powder.
And yes, the cake still had a little attitude during cooling. But when I cut it open, the honeycomb was actually there!
Now I’m sharing the updated recipe, everything I’ve learned from my dad, and the little details that can make a huge difference.
What Is Bánh Bò Nướng?
Bánh bò nướng is a traditional Vietnamese baked honeycomb cake known for its distinctive airy, chewy interior and golden-brown exterior.
The name can be broken down into a few parts:
- Bánh: A general Vietnamese term for cakes and many other flour- or starch-based foods.
- Bò: Part of the traditional name of this cake.
- Nướng: Baked or roasted.
You’ll also hear this dessert called bánh bò nướng lá dứa, which refers to the pandan version.
Despite its English name, Vietnamese honeycomb cake doesn’t contain any honey.
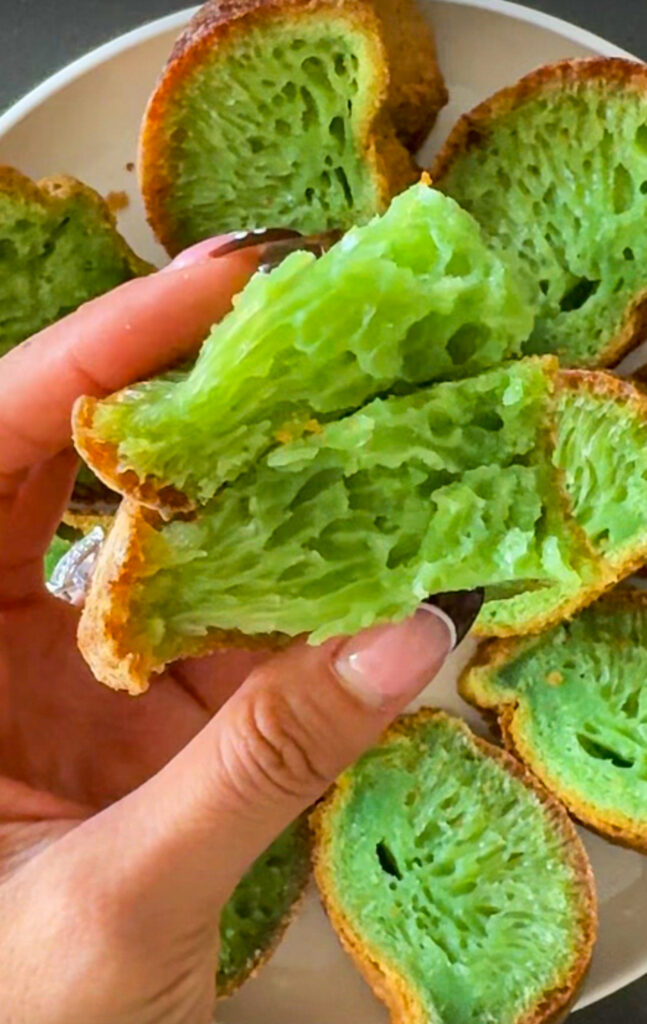
The name comes from the beautiful honeycomb-like pattern that forms inside the cake when it’s baked correctly.
And that’s what makes this dessert so special.
Unlike a traditional Western sponge cake, bánh bò nướng isn’t supposed to have a soft, fluffy, crumbly texture. It’s supposed to be springy, chewy, slightly elastic, and filled with those long, almost tunnel-like air pockets.
When you bite into it, there’s a little resistance from the tapioca starch, followed by a lovely bounce.
The outside develops a golden crust, while the inside stays soft and fragrant with coconut and pandan.
It’s one of those desserts where the texture is just as important as the flavor.
The History of Vietnamese Honeycomb Cake
Bánh bò has been part of Vietnamese food culture for generations, especially as a familiar snack and dessert found in markets, bakeries, and family kitchens.
There are several variations, including steamed bánh bò, baked bánh bò, and palm sugar versions.
Although the exact origin of the dish isn’t firmly documented, these cakes reflect the long history of rice and starch-based desserts in Vietnamese cooking.
Ingredients like coconut milk, rice flour, tapioca starch, and palm sugar have traditionally been used in many Vietnamese sweets, especially throughout southern Vietnam.
Pandan is another ingredient commonly associated with Southeast Asian desserts.
Its naturally fragrant leaves add a subtle flavor that’s difficult to describe if you’ve never tried it.
Think grassy, floral, slightly nutty, and almost vanilla-like.
When combined with coconut milk, pandan gives bánh bò nướng that recognizable aroma.
And of course, depending on whether you’re using fresh pandan juice or pandan extract, the cake can range from a soft natural green to a much brighter shade.
One thing I particularly love about this dessert is that there are so many family variations.
Some recipes use yeast, others use different chemical leavening agents, and some incorporate rice flour alongside tapioca starch.
The version I’m sharing is based on my dad’s family method, simplified for a typical home kitchen.
Bánh Bò Nướng vs. Bánh Bò Hấp
If you’ve visited a Vietnamese bakery, you’ve probably seen two different types of bánh bò.
Although they’re related, they have different appearances, preparation methods, and textures.
Bánh Bò Hấp (Steamed Honeycomb Cake)
Bánh bò hấp is the steamed version.
These are usually smaller, softer cakes that come in individual portions. They’re often white, green, or pink and have a fluffy, spongy texture.
Many traditional steamed recipes rely on fermentation to create their airy structure.
Growing up, I actually preferred this version.
There’s something about those little colorful cakes that makes them so fun to eat.
Bánh Bò Nướng (Baked Honeycomb Cake)
Bánh bò nướng is baked rather than steamed.
It typically develops a deeper golden-brown exterior with a more pronounced chewy texture.
The inside should have elongated honeycomb strands rather than the softer, more open crumb of many steamed versions.
As an adult, I’ve definitely come to appreciate the baked version more.
I especially love the contrast between the slightly crisp exterior and the chewy pandan center.
Plus, slicing the cake open to reveal that honeycomb pattern is always satisfying.
Assuming it cooperates, of course.
Why Is Bánh Bò Nướng So Difficult to Make?
This might be the question I get asked the most.
How can a cake with so few ingredients be so difficult?
The answer has everything to do with how the ingredients work together.
Bánh bò nướng relies on a combination of eggs, tapioca starch, moisture, leavening, and heat to develop its structure.
As the cake bakes, gases expand inside the batter while the egg proteins and starch begin setting around them.
Ideally, this creates those beautiful elongated air pockets.
But if the cake expands faster than its structure can support, it can rise dramatically before collapsing.
And unlike a regular sponge cake, where a little deflation might still leave you with something fluffy, bánh bò nướng can become extremely dense when that structure fails.
I learned this the hard way.
I’ve had cakes that looked absolutely beautiful through the oven window. They were tall, golden, and practically overflowing with confidence.
Then the oven door opened.
And suddenly I had a dense green pancake.
Not exactly what we were going for.
After comparing my original recipe with my dad’s newer method, I realized there were a few techniques that deserved more attention.
Most importantly, how gently we mix the eggs, how evenly we distribute the baking powder, and how we handle the hot Bundt pan.
Why I Updated My Dad’s Recipe
When I originally filmed this recipe with my dad, we used a larger batch with eight eggs.
My dad has continued experimenting with even larger versions, including batches with nine eggs.
Recently, he told me that he’s been warming the coconut milk with the sugar, gently mixing the batter in one direction, and adding the baking powder near the end.
He also tested different amounts of baking powder and preferred the rise he got with two teaspoons in his larger batch.
But I didn’t necessarily want to copy his measurements exactly.
I wanted to make a smaller version with ingredients that would be easy for people to find at their regular grocery stores.
I also specifically wanted to use double-acting baking powder, since that’s what I normally keep in my kitchen.
And because I grow fresh pandan, I wanted to incorporate a little fresh pandan juice into the batter without adding too much extra liquid.
The resulting recipe uses just six eggs, 200 ml of combined coconut milk and pandan juice, and 1½ teaspoons of double-acting baking powder.
My first test produced beautiful honeycomb strands, although the cake rose unevenly and partially deflated during cooling.
That’s when I realized two additional details were worth refining: making sure the baking powder was evenly incorporated and following my dad’s method of covering the Bundt pan’s center tube while pouring the batter.
Sometimes the smallest techniques make the biggest difference.
Ingredients You’ll Need
One of my favorite things about this recipe is that you don’t need a long list of specialty ingredients.
Most of these can be found at an Asian grocery store, and several are probably already in your pantry.
Eggs
We’re using six large eggs.
Eggs provide structure and help the cake hold its shape as it bakes.
For this recipe, I recommend using room-temperature eggs so they combine more easily with the other ingredients.
But here’s the important part: don’t vigorously beat them.
We’re not making a traditional sponge cake where we want to whip a bunch of air into the eggs.
In fact, incorporating too much air can contribute to an unstable rise.
My updated technique is to cut the yolks with clean kitchen scissors before gently stirring the eggs.
I know that sounds a little unusual, but it works!
By breaking the yolks first, you don’t have to whisk nearly as much to combine everything.
Tapioca Starch
Tapioca starch is responsible for that signature chewy, bouncy texture.
For this recipe, we’re using 240 grams of tapioca starch.
I highly recommend measuring it with a kitchen scale.
Depending on how the starch is scooped, cup measurements can vary, and I really don’t want you accidentally adding too much.
Look for finely ground tapioca starch, sometimes labeled tapioca flour.
Do not substitute all-purpose flour, cornstarch, or glutinous rice flour. They behave differently and won’t give you the same texture.
Coconut Milk
We’re using 170 ml of full-fat coconut milk.
Make sure you’re buying unsweetened coconut milk intended for cooking, not the refrigerated coconut beverage that comes in a carton.
Full-fat coconut milk gives the cake a richer flavor and pairs beautifully with pandan.
If the coconut milk has separated in the can, stir it well before measuring.
Fresh Pandan Juice
This is one of my favorite additions to the updated recipe.
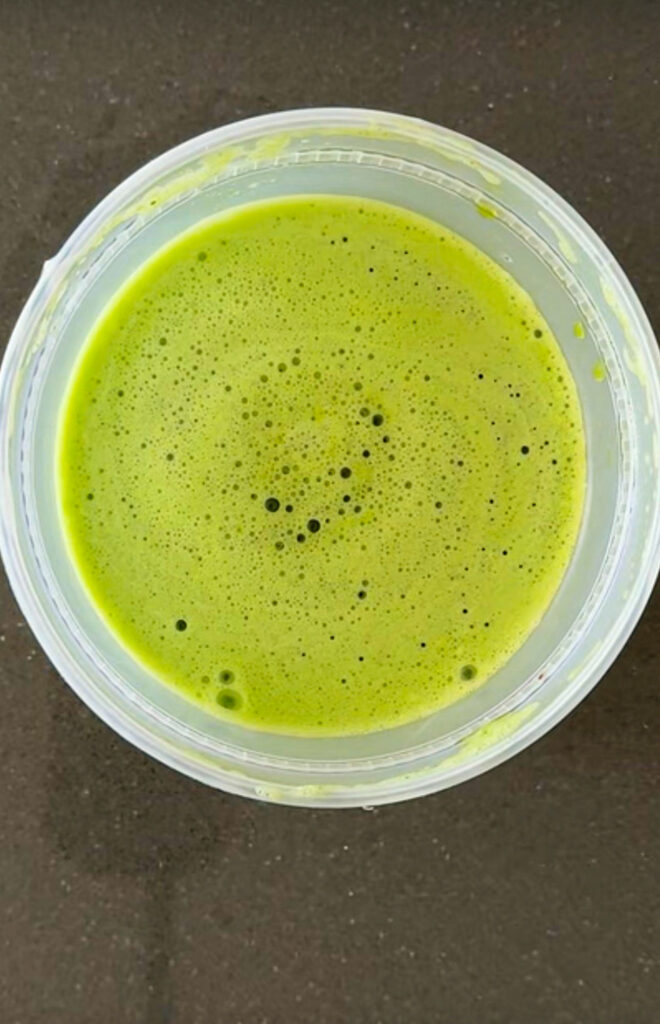
We’re using 30 ml, or two tablespoons, of concentrated fresh pandan juice.
Fresh pandan has a lovely natural aroma that commercial extract doesn’t quite replicate.
And since I grow pandan at home, I love finding ways to incorporate it into my recipes.
However, we’re not adding the pandan juice on top of the original coconut milk quantity.
Instead, we’re replacing 30 ml of coconut milk with 30 ml of pandan juice.
That way, the combined liquid quantity stays at 200 ml.
It’s a small detail, but an important one when working with a cake that’s sensitive to changes in its batter.
Pandan Extract
Even though I’m using fresh pandan juice, I still like adding ½ teaspoon of pandan extract.
Fresh pandan gives the cake a more natural fragrance, while a small amount of extract helps strengthen the flavor and color.
You can adjust the amount slightly depending on the brand you’re using.
Some pandan pastes are much more concentrated than others.
Sugar
We’re using 190 grams of granulated white sugar.
Sugar doesn’t just add sweetness. It also affects moisture and the way the cake sets.
I wouldn’t recommend making large reductions to the sugar without testing the recipe again.
Double-Acting Baking Powder
We’re using 1½ teaspoons of double-acting baking powder.
This is regular baking powder commonly sold at American grocery stores.
Some traditional bánh bò nướng recipes specifically recommend single-acting baking powder, but double-acting baking powder can also work when used in a suitable formula.
I was able to achieve honeycomb using the double-acting version in my latest test.
One thing I want to emphasize is that baking powder is not the same as baking soda.
Do not substitute baking soda for the baking powder in this recipe.
And make sure your baking powder is fresh.
Neutral Oil, Vanilla, and Salt
The remaining ingredients are simple:
- One tablespoon neutral oil for a little richness
- One teaspoon vanilla extract to complement the pandan
- ¼ teaspoon salt to balance the sweetness
You don’t need an electric mixer or any fancy equipment to make this cake.
In fact, I’d rather you leave the mixer in the cabinet for this one.
How to Make Fresh Pandan Juice
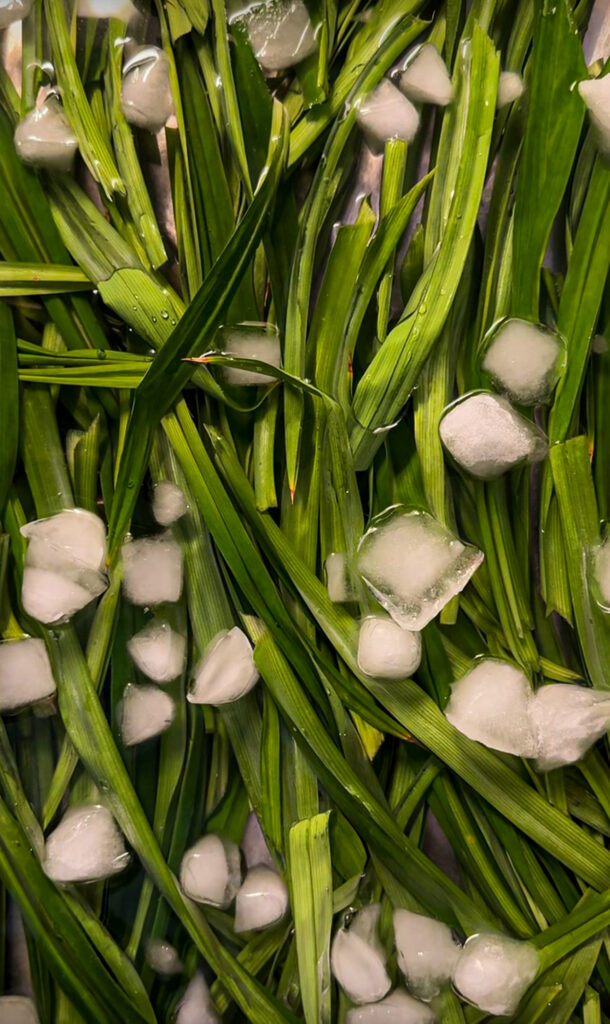
If you have access to fresh or frozen pandan leaves, making your own juice is surprisingly easy.
I like using around five to seven pandan leaves for a small batch.
First, rinse the leaves thoroughly to remove any dirt.
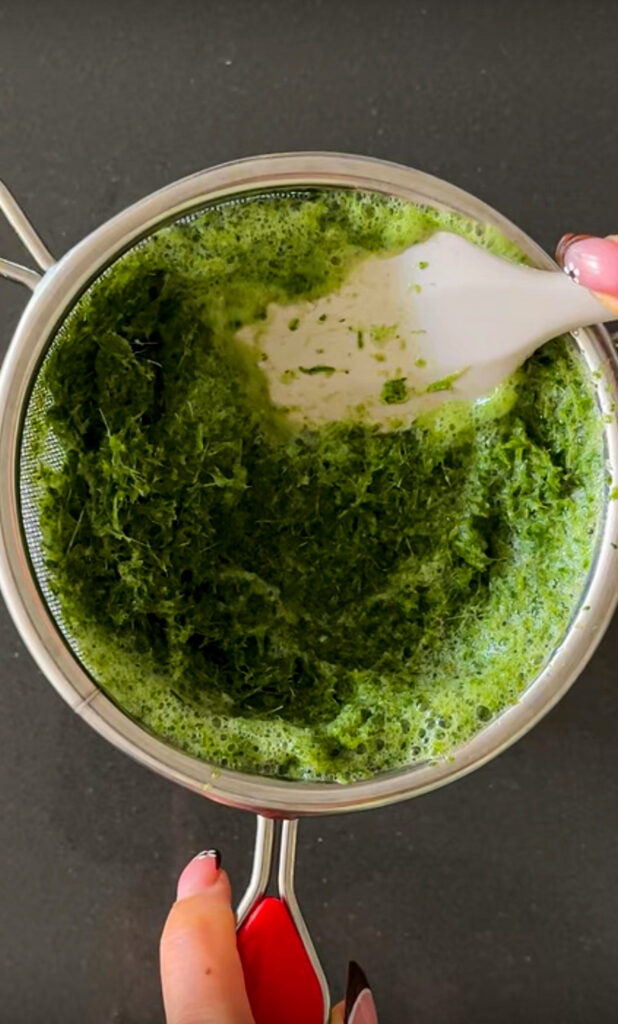
Cut them into small pieces with kitchen scissors, then add them to a blender with approximately 50–60 ml water.
Blend until the leaves are finely broken down and the water turns green.
Pour the mixture through a fine-mesh strainer or cheesecloth and squeeze out as much juice as possible.
Measure exactly 30 ml for the recipe.
Keep in mind that freshly blended pandan juice varies in strength depending on the leaves and how much water you use.
If you want a stronger flavor, use less water when blending or let the juice settle in the refrigerator and use some of the concentrated green sediment.
Just make sure your final measurement is still 30 ml.
What if I don’t have fresh pandan?
No worries!
Replace the 30 ml pandan juice with another 30 ml of coconut milk.
That means you’ll use 200 ml coconut milk total.
Then use pandan extract to provide the flavor and color.
Start with ½ teaspoon and adjust according to the strength of your extract.
I love the fresh pandan version, but I also want this recipe to be accessible to people who don’t have pandan growing in their backyard.
My Dad’s Bundt Pan Trick
This is one of the most interesting techniques I’ve learned from my dad.
He covers the opening of the center tube of his Bundt pan with aluminum foil before pouring in the batter.
Instead of pouring the batter directly onto one side of the pan, he pours it over the foil-covered center.
The batter flows outward and distributes around the ring.
Why does this matter?
During one of my recent tests, I forgot to cover the center opening.
Because I didn’t want to pour the batter down the middle hole, I poured everything into one section of the Bundt pan instead.
That side ended up rising noticeably higher than the rest of the cake.
It also experienced more deflation as the cake cooled.
Now, pouring the batter into one spot doesn’t automatically mean all the baking powder ends up in that area.
But introducing the batter unevenly into a hot pan could contribute to differences in how the batter spreads and begins setting.
There’s another detail worth mentioning.
During that same test, I noticed the baking powder was a little clumpy when I added it.
I was so worried about overmixing that I didn’t want to stir too much.
Looking back, it’s possible that the baking powder wasn’t evenly distributed throughout the batter.
So for the updated method, I’m making two small adjustments:
First, sift the baking powder evenly into the batter.
Second, use my dad’s foil-covered center tube technique to distribute the batter more evenly.
These are refinements to the version that already produced honeycomb, rather than changes to the ingredient measurements.
The Secret to Mixing the Eggs
If I could give you one piece of advice before making bánh bò nướng, it would be this:
Do not treat the eggs like you’re making scrambled eggs or a fluffy sponge cake.
You want to combine them gently without incorporating a bunch of additional air.
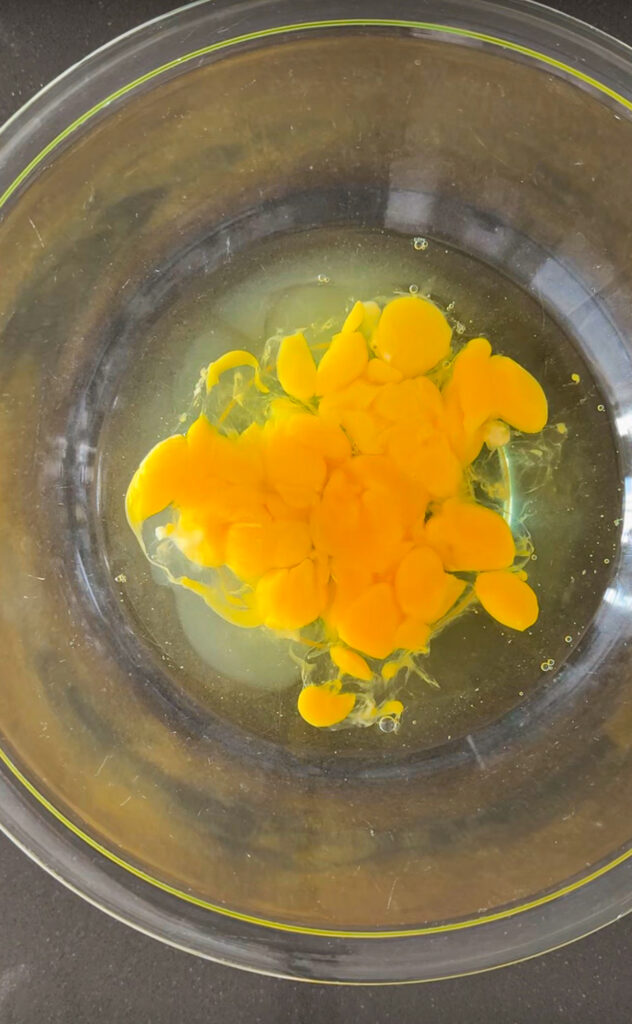
For my updated recipe, I crack the eggs into a large bowl and use clean kitchen scissors to cut through the yolks.
Once the yolks are broken, I take a whisk and gently stir everything together.
The key is to keep the whisk close to the bottom of the bowl rather than lifting it in and out of the mixture.
My dad also recommends stirring in one direction.
I follow that technique because it helps me keep the mixing slow and controlled.
The goal isn’t to create foam or increase the volume of the eggs.
We just want the yolks and whites combined.
And please don’t interpret gentle mixing as leaving large pockets of unmixed ingredients.
You still want everything incorporated.
We’re avoiding excessive aeration, not avoiding mixing altogether.
Why I Add the Baking Powder Last
Another technique I picked up from my dad is adding the baking powder toward the end of the mixing process.
Double-acting baking powder releases some gas when it first comes into contact with liquid and additional gas when heated.
By adding it shortly before baking, we can avoid letting the finished batter sit around unnecessarily.
But here’s something I learned from my first test.
I added the baking powder directly into the batter, and it formed little clumps.
Because I was afraid of overmixing, I didn’t stir as thoroughly as I normally would.
The cake still developed beautiful honeycomb strands, but the rise was uneven.
For the updated method, I recommend sifting the baking powder evenly over the surface of the batter.
Then gently stir just until it’s completely incorporated.
If you still see dry clumps, keep mixing gently until they’re gone.
A few extra gentle stirs are better than leaving pockets of concentrated baking powder in the batter.
Once the baking powder has been incorporated, pour the batter into your prepared pan promptly.
How to Make Bánh Bò Nướng Step by Step
Step 1: Prepare the Pandan Juice
Wash and cut your pandan leaves into small pieces.
Blend with a small amount of water, then strain thoroughly.
Measure out 30 ml of concentrated pandan juice.
If you’re using pandan extract only, replace this liquid with additional coconut milk.
Step 2: Prepare the Bundt Pan
Position an oven rack in the middle of the oven and preheat to 350°F (175°C).
Use a 10–12 cup metal Bundt pan suitable for this temperature.
Lightly brush the interior with a thin layer of neutral oil, making sure you can still release the finished cake. Avoid heavily coating the pan.
Cover the opening at the top of the center tube securely with a small piece of aluminum foil.
Place the prepared pan in the oven to preheat while you make the batter, provided your pan’s manufacturer permits preheating it this way.
The goal is to have a hot pan ready when the batter is finished.
Step 3: Warm the Coconut Milk and Sugar
In a small saucepan, combine the coconut milk, sugar, and salt.
Heat over low to medium-low heat, stirring until the sugar dissolves.
There’s no need to boil the mixture.
Once the sugar has dissolved, remove the saucepan from the heat.
Stir in the fresh pandan juice, pandan extract, vanilla, and neutral oil.
Allow the mixture to cool until lukewarm, ideally below 100°F (38°C).
You don’t want the coconut mixture hot enough to cook the eggs when you combine everything.
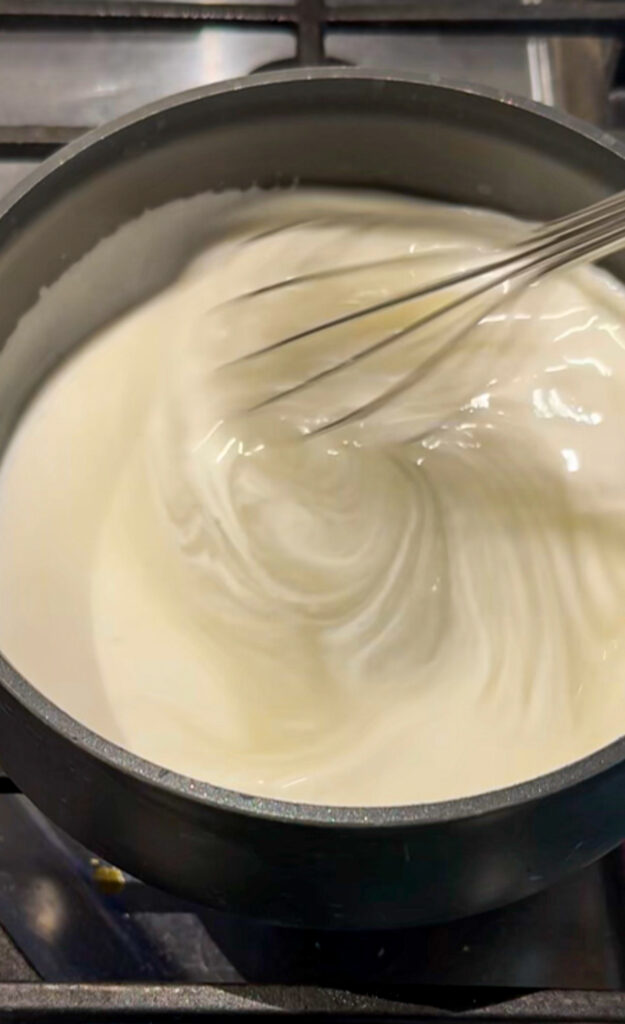
Step 4: Gently Mix the Eggs
Crack six room-temperature eggs into a large mixing bowl.
Use clean kitchen scissors to gently snip through the yolks.
Then use a whisk or fork to slowly combine the eggs.
Keep the whisk submerged and avoid beating vigorously.
The eggs should be combined without becoming thick or foamy.
Step 5: Combine the Wet Ingredients
Slowly pour the lukewarm coconut-pandan mixture into the eggs.
Stir gently in one direction until everything is incorporated.
Don’t rush this step.
You want the mixture combined without whipping unnecessary air into it.
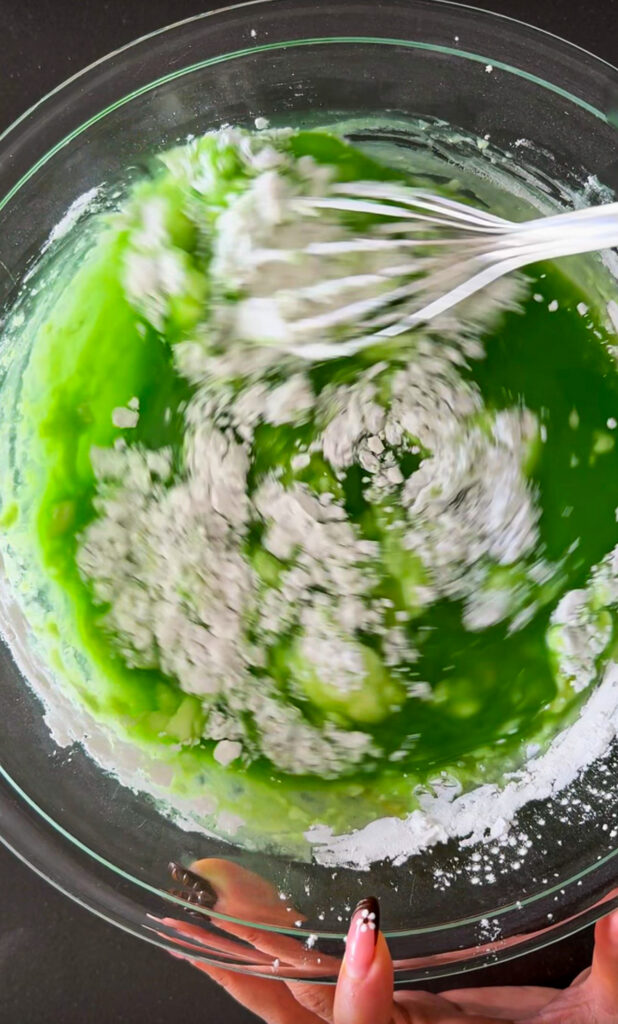
Step 6: Add the Tapioca Starch
Sift the tapioca starch into the wet ingredients in two or three additions.
Gently mix after each addition.
The batter should be relatively thin and pourable rather than thick like a traditional cake batter.
A few small lumps are okay at this stage because we’re going to strain the mixture.
Step 7: Strain the Batter
Pour the mixture through a fine-mesh strainer into a clean bowl or pouring jug.
This helps remove any remaining tapioca starch or egg lumps.
Use a spatula to gently work through small lumps without whipping the mixture.
I prefer doing this before adding the baking powder so I can distribute the leavening evenly afterward.
Step 8: Add the Baking Powder Last
Measure 1½ teaspoons of fresh double-acting baking powder.
Using a small fine-mesh sieve, sprinkle it evenly over the surface of the batter.
Gently whisk in one direction until there are no visible dry clumps.
Don’t beat the batter, but make sure the powder is thoroughly incorporated.
Once combined, move directly to filling the pan.
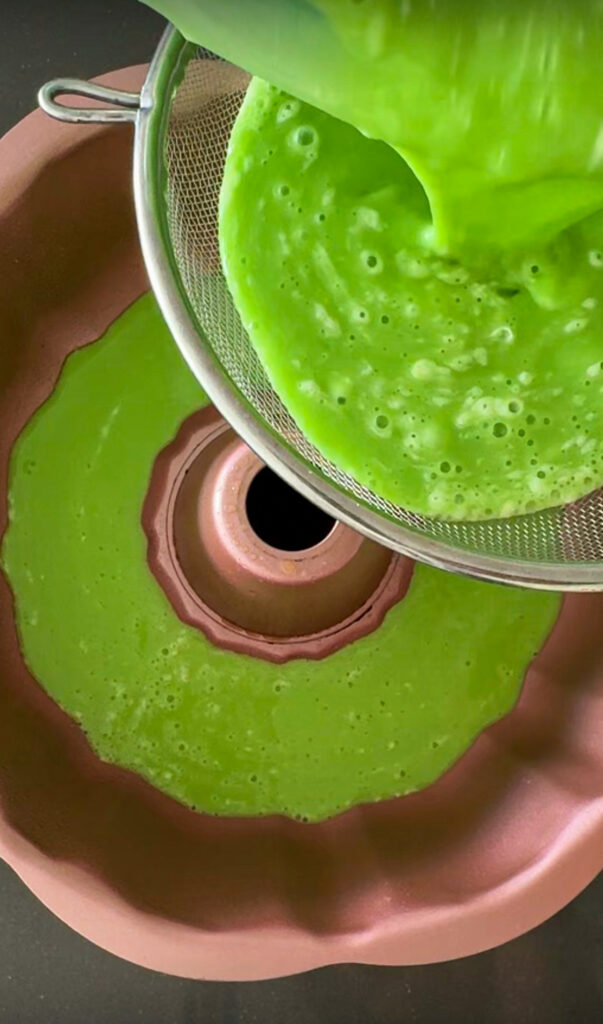
Step 9: Pour Into the Hot Bundt Pan
Carefully remove the preheated Bundt pan from the oven and place it on a heat-safe surface.
With the center tube’s opening covered securely by aluminum foil, slowly pour the batter toward the covered center.
Allow it to flow outward and distribute around the entire ring.
The foil should act as a temporary cover over the hole so batter doesn’t pour down the middle. Make sure it stays securely in place and doesn’t become submerged in the batter.
Return the pan to the oven promptly.
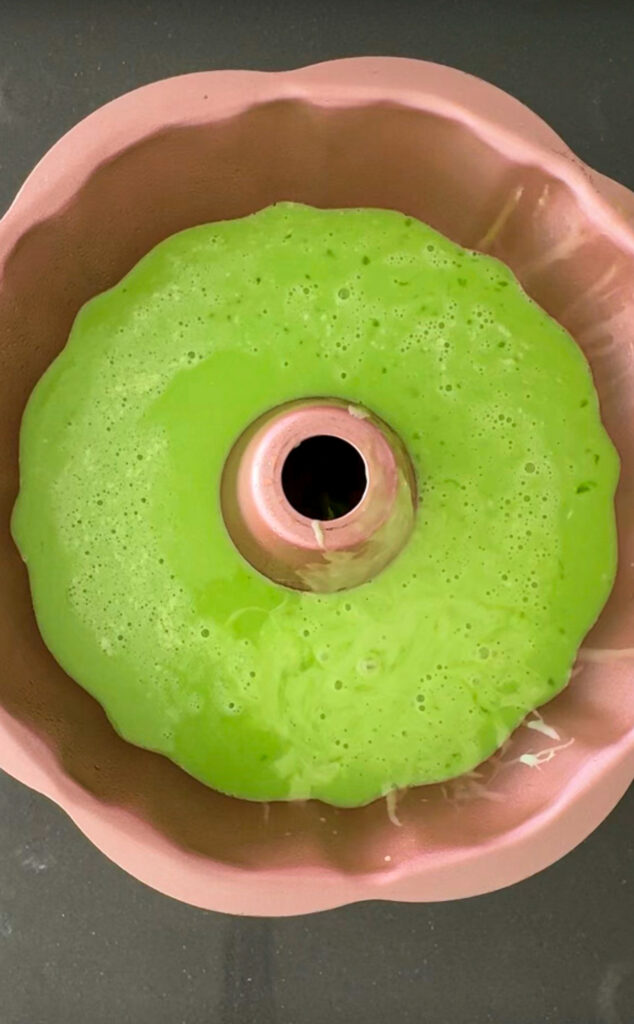
Step 10: Bake for 55–60 Minutes
Bake at 350°F (175°C) for approximately 55 minutes.
Avoid opening the oven during the initial rise, especially during the first 45 minutes.
The cake should develop a golden-brown exterior and a set center.
At 55 minutes, check for doneness. If the center is still visibly wet or a skewer comes out coated in uncooked batter, continue baking for another five minutes before checking again.
Don’t remove the cake simply because it has risen beautifully.
It needs enough time for the internal structure to set.
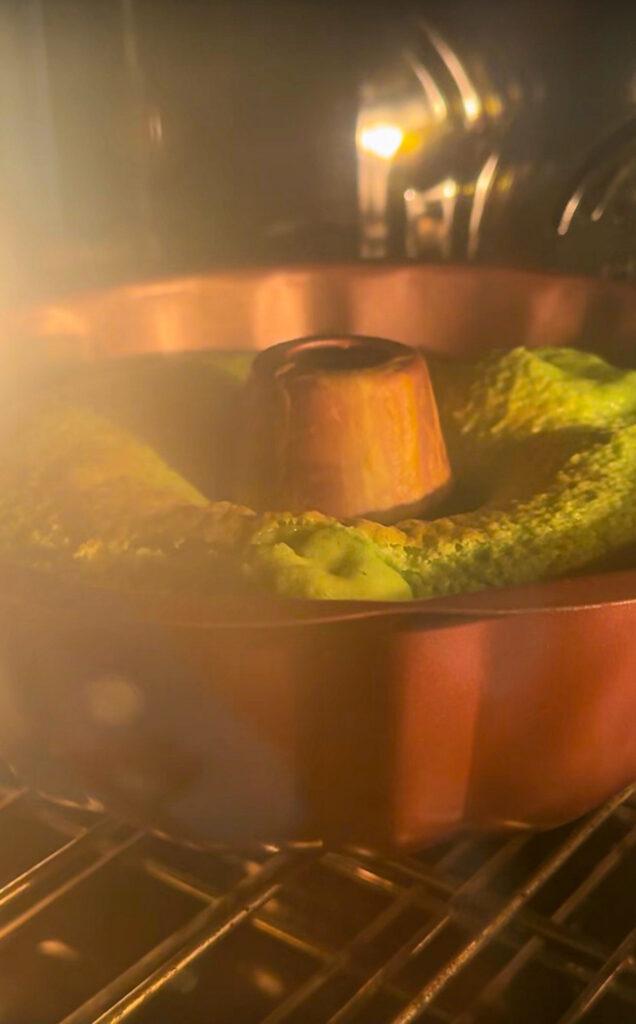
Step 11: Cool Gradually in the Oven
Once the cake is fully baked, turn off the oven.
Keep the oven door completely closed for 10 minutes.
After that, crack the oven door open approximately one to two inches and let the cake sit for another 15 minutes.
This is the cooling schedule I used during my successful honeycomb test.
Some shrinking during this stage is normal.
However, if the cake loses a significant amount of height, the problem may be related to the internal structure rather than simply the cooling temperature.
Step 12: Cool Completely in the Bundt Pan
Remove the cake from the oven and place the Bundt pan upright on a wire cooling rack.
Leave the cake inside the pan while it cools.
This is how my dad likes to do it, and I prefer the simplicity of not having to flip a delicate hot cake.
Allow approximately one to two hours for cooling, depending on your pan and room temperature.
In my first successful test, I was able to slice the cake after approximately one hour of additional cooling and reveal the honeycomb.
Once completely cooled, gently loosen the edges and center if necessary, then invert the cake onto a serving plate or cutting board.
Slice with a sharp or serrated knife.
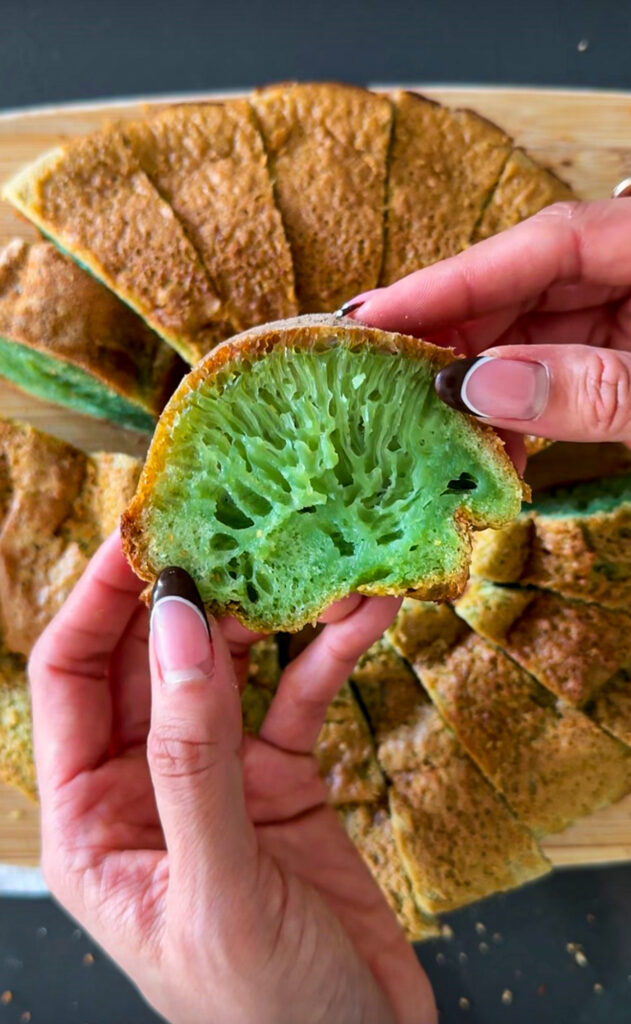
And hopefully, this is the moment you’ve been waiting for: beautiful green honeycomb strands!
How Do You Know if Bánh Bò Nướng Is Successful?
The most obvious sign is the honeycomb pattern inside.
When you slice the cake, you should see elongated air pockets extending through the interior.
These can look like vertical strands, tiny tunnels, or delicate branching structures.
The pattern doesn’t have to look exactly the same in every section.
During my latest test, some slices had larger, more prominent honeycomb strands, while others had a slightly tighter structure.
But the honeycomb was clearly there.
Beyond appearance, the cake should have a springy, chewy texture.
It shouldn’t be dry and crumbly like a traditional sponge cake.
However, it also shouldn’t be so wet and dense that it resembles uncooked batter.
A little chewiness and elasticity are exactly what we’re looking for.
Why Did My Bánh Bò Nướng Deflate?
This is probably the biggest troubleshooting question, and it’s one I completely understand.
I’ve been there.
The cake rises beautifully, you’re feeling confident, and then suddenly it starts sinking.
There are several possible reasons.
1. The Eggs Were Overmixed
Vigorous whisking can introduce too much air into the batter.
This can contribute to a dramatic rise that isn’t adequately supported as the cake cools.
Try using my scissors technique to break the yolks first, then gently stir.
You don’t need an electric mixer for this recipe.
2. The Baking Powder Wasn’t Evenly Distributed
This was one of the issues I noticed during my latest test.
If the baking powder forms clumps or isn’t evenly incorporated, some parts of the batter may receive more leavening than others.
This could contribute to an uneven rise.
Sifting the baking powder before gently incorporating it should help prevent those concentrated pockets.
3. The Cake Was Underbaked
A cake can look fully baked on the outside while the interior still needs more time.
If the internal structure hasn’t set, it may collapse as it cools.
That’s why I use 55 minutes as my starting baking time rather than removing the cake based on its appearance alone.
If it’s not fully set, keep baking.
4. The Oven Temperature Was Inconsistent
Not all ovens heat evenly.
If one side of your oven runs hotter than the other, the cake might develop an uneven crust or rise.
An oven thermometer can help you verify the actual temperature.
I also recommend using the center rack.
5. The Batter Wasn’t Distributed Evenly
If you’re pouring batter into a hot Bundt pan from one side, it may not spread as evenly as expected.
That’s one reason I’m incorporating my dad’s center-tube foil technique.
It helps guide the batter around the ring rather than concentrating the pour in a single area.
6. The Cake Cooled Before Its Structure Was Stable
An abrupt temperature change can contribute to shrinkage, but it isn’t always the underlying cause of a collapse.
A fully baked cake should have enough structure to retain its honeycomb even if it shrinks somewhat.
Gradual cooling can help, but it can’t completely compensate for an underbaked or improperly mixed cake.
Can I Use Double-Acting Baking Powder?
Yes!
For this version, I’m using 1½ teaspoons of regular double-acting baking powder.
Double-acting baking powder is widely available in American grocery stores and typically releases gas in two stages: when moistened and when heated.
Many older bánh bò nướng recipes specifically call for single-acting baking powder.
That’s partly why this dessert can be confusing when you’re researching recipes online.
However, recipes formulated for double-acting baking powder do exist, and I achieved honeycomb using it in my six-egg test.
The important part is using the amount specified in the recipe rather than assuming different types of baking powder are interchangeable in every formula.
And again, don’t substitute baking soda.
Do I Need Rice Flour?
Not for this particular recipe.
Some Vietnamese honeycomb cake recipes incorporate a little regular rice flour to adjust the texture and provide additional structure.
For my dad-inspired version, I’m keeping the ingredient list simple and using tapioca starch as the main starch.
This was the formula that produced the honeycomb in my test.
I don’t want to add another ingredient without a reason, especially when the goal is to make the recipe more approachable.
If I experiment with rice flour in the future, I’ll treat that as a separate variation.
Do I Need a Bundt Pan?
For this recipe, I recommend one.
The Bundt pan creates that recognizable ring shape and provides plenty of surface area for the exterior to brown.
The center tube also allows heat to reach the batter from the inside of the ring, which is useful for a cake that depends on setting its internal structure.
I’m using a metal Bundt pan.
I would avoid changing to a silicone Bundt pan for your first attempt because silicone conducts heat differently and may produce different results.
Other cake pans can work with recipes designed for them, but the baking time and technique may need to be adjusted.
Can I Make Bánh Bò Nướng Without Fresh Pandan?
Absolutely.
Although I personally love using fresh pandan juice, I know it isn’t available everywhere.
If you can’t find fresh pandan leaves, simply replace the 30 ml pandan juice with more full-fat coconut milk.
You’ll use 200 ml coconut milk total.
Then add pandan extract according to the strength of the product.
This is probably the easiest option for people who don’t have access to fresh pandan.
How to Store Bánh Bò Nướng
Bánh bò nướng tastes best when freshly made because the texture is at its springiest.
Once the cake has completely cooled, store it in an airtight container.
You can generally keep a fully baked, unfrosted cake at room temperature for up to two days in a cool environment.
For longer storage, refrigerate for approximately four to five days.
Refrigeration can make the tapioca starch firmer, so I recommend warming individual slices briefly before eating.
A few seconds in the microwave can help restore some of that soft, chewy texture.
You can also freeze individual slices in airtight packaging for longer storage.
Thaw before gently reheating.
Frequently Asked Questions
Why doesn’t my bánh bò nướng have honeycomb?
The most common potential issues include overmixing, inactive or unevenly incorporated baking powder, incorrect ingredient measurements, and insufficient baking.
Start by checking your baking powder, measuring the tapioca starch by weight, and making sure the cake is fully baked.
Why is my bánh bò nướng gummy?
Some chewiness is normal because of the tapioca starch.
However, an excessively wet, paste-like interior may indicate underbaking, an incorrect ingredient ratio, or a collapsed structure.
It’s important to distinguish between the normal elastic texture of bánh bò nướng and an unset center.
Can I reduce the sugar?
You can experiment with the sugar, but I don’t recommend making major changes when you’re attempting the recipe for the first time.
Sugar affects more than sweetness, so reducing it can change the cake’s moisture and texture.
Can I use coconut cream instead of coconut milk?
Coconut cream contains more fat and less water than many coconut milks, so it isn’t a direct equivalent in every recipe.
For the most consistent results, use full-fat coconut milk as written.
Can I open the oven while the cake is baking?
I recommend leaving the oven closed during the initial rise, especially for the first 45 minutes.
Opening the oven can cause a sudden temperature drop.
Closer to the end of baking, it’s appropriate to check for doneness.
Why does my cake shrink after baking?
Some shrinkage is normal as steam escapes and the cake cools.
What you want to avoid is a dramatic collapse that leaves behind a dense, gummy interior.
A cake can lose some height and still have an excellent honeycomb texture inside.
Can I use a hand mixer?
I wouldn’t recommend it for this recipe.
A fork or handheld whisk gives you much better control over how much air is incorporated into the eggs and batter.
Can I make this cake ahead of time?
Yes!
You can bake it earlier in the day and allow it to cool completely before serving.
For the best texture, I personally prefer serving it the same day.
My Final Thoughts
If there’s one thing this recipe has taught me, it’s patience.
I originally thought that once I had my dad’s measurements written down, making bánh bò nướng would be pretty straightforward.
Clearly, I underestimated this cake.
But after revisiting the recipe, comparing my dad’s newer techniques, and experimenting with a smaller six-egg version, I feel like I understand it much better.
My latest cake wasn’t perfectly even.
One side rose more than the other, and part of it sank while cooling.
But when I finally sliced it open, there were those beautiful honeycomb strands!
And that was a huge improvement over the dense cakes I’d made before.
The biggest lessons I’ve learned are to mix the eggs gently, make sure the baking powder is thoroughly incorporated, distribute the batter as evenly as possible, and allow enough baking time for the cake to set.
I also love that this updated recipe uses fewer eggs and ingredients that are easier to find.
It’s still based on my dad’s recipe, just adjusted for my own kitchen and the way I like to cook.
And honestly, that’s one of my favorite things about sharing family recipes.
They’re never really finished evolving.
If you make this bánh bò nướng, I’d love to hear how it turns out. Especially if you get those beautiful honeycomb strands!
Now, let’s get into the recipe!

How To Make Bánh Bò Nướng (Vietnamese Honeycomb Cake)
10-12
servings25
minutes55
minutesA Vietnamese pandan honeycomb cake with a golden crust and a chewy, bouncy interior. This simplified version of my dad’s recipe uses just six eggs and regular double-acting baking powder.
Ingredients
6 large eggs, room temperature
240 g tapioca starch
190 g granulated sugar
170 ml full-fat coconut milk
30 ml fresh pandan juice (2 tbsp)
1½ tsp double-acting baking powder
½ tsp pandan extract
1 tsp vanilla extract
1 tbsp neutral oil
¼ tsp salt
Cooking spray, for greasing
Directions
- Preheat oven: Preheat to 350°F (175°C). Lightly coat a metal Bundt pan with cooking spray. Secure aluminum foil over the center tube opening and preheat the pan in the oven, if permitted by the manufacturer.
- Heat coconut mixture: In a saucepan over low heat, combine coconut milk, sugar, and salt. Stir until dissolved. Remove from heat and mix in pandan juice, pandan extract, vanilla, and oil. Cool until lukewarm (below 100°F).
- Mix eggs: Crack eggs into a bowl and cut the yolks with clean kitchen scissors. Gently whisk in one direction until combined, avoiding foam.
- Combine batter: Slowly stir the coconut mixture into the eggs. Sift in tapioca starch in batches, mixing gently until incorporated. Strain: Pour batter through a fine-mesh sieve to remove lumps.
- Add baking powder: Sift baking powder evenly over the batter last. Gently stir until completely incorporated, with no visible clumps.
- Pour: Carefully remove the hot Bundt pan. Slowly pour batter over the foil-covered center tube, allowing it to spread evenly around the pan. Return immediately to the oven.
- Bake: Bake for 55–60 minutes, until golden brown and fully set. Avoid opening the oven during the first 45 minutes.
- Cool in oven: Turn off the oven and leave the door completely closed for 10 minutes. Crack the door slightly and let cool for another 15 minutes.
Cool and serve: Remove from oven and cool completely in the Bundt pan on a wire rack, approximately 1–2 hours. Gently unmold, slice, and enjoy!
Notes
- Fresh pandan substitute: Replace the pandan juice with 30 ml additional coconut milk (200 ml total) if unavailable.
Baking powder: Use double-acting baking powder, not baking soda. Sift it in last to prevent clumps.
Gentle mixing: Avoid vigorously whisking the eggs or batter. Mix just until incorporated.
Bundt pan: Covering the center tube with foil and pouring toward the middle is my dad’s technique for distributing batter more evenly.
Cooling: Keep the cake in the Bundt pan until completely cooled. Slight shrinkage is normal.
Storage: Store airtight at room temperature for up to 2 days or refrigerate for up to 4–5 days. Warm refrigerated slices briefly before serving.


Hi Jen great recipe! Taste is great but it deflated. What did I do wrong
Hi Lilly! Thanks for your comment! A number of things could happen during the process so it’s a bit tricky to tell but when the cake finished cooking, did you leave it in the oven for 5 mins, then crack the oven open for another 5 mins before removing it?
Yes I did do both of these things